Guides for Running Falcon-40B (Base, Instruct, Uncensored) on GPU Clouds
Table of Contents
Falcon-40B is interesting, but running it isn’t as easy as it could be. So Siddharth wrote guides and did video tutorials to cover running all the Falcon-40B variants on 3 GPU clouds that I like for large VRAM GPUs.
Models #
We are going to use the following HF models:
- Falcon-40B – tiiuae/falcon-40b
- Falcon-40B-Instruct – tiiuae/falcon-40b-instruct
- Falcon-40B-Uncensored – ehartford/WizardLM-Uncensored-Falcon-40b
Running on Runpod #
The process of running the model on Runpod is straightforward and the same for all three models. You can follow the video tutorial covering deploying Falcon-40B below to get started. The steps of deploying other models are the same in the case of Runpod.
Steps to deploy Falcon-40B Family on Runpod #
- Sign up for Runpod
- Add $10 to your balance
- Go to the console and click deploy under ‘1x A100 80GB’
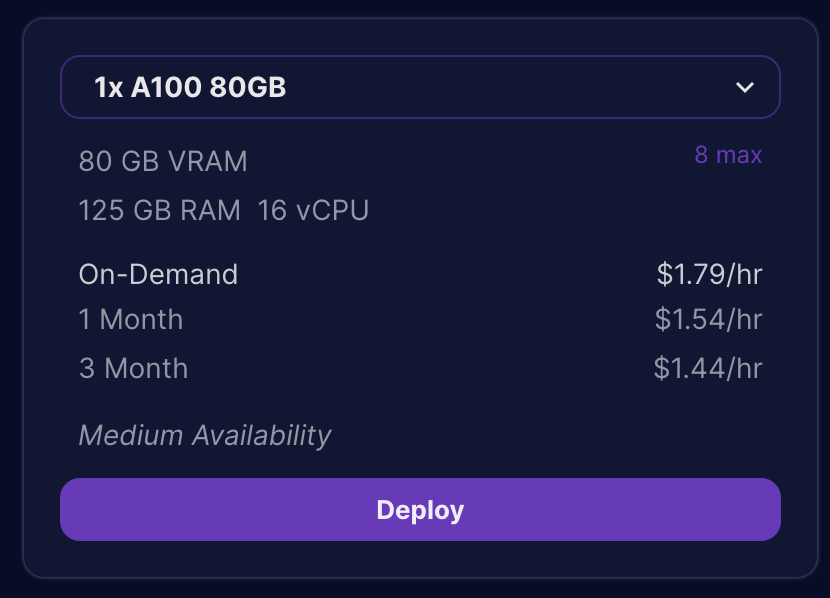
- From the templates, select the
TheBloke LLMstemplate. ClickCustomize Deploymentand add another200 GBof storage space.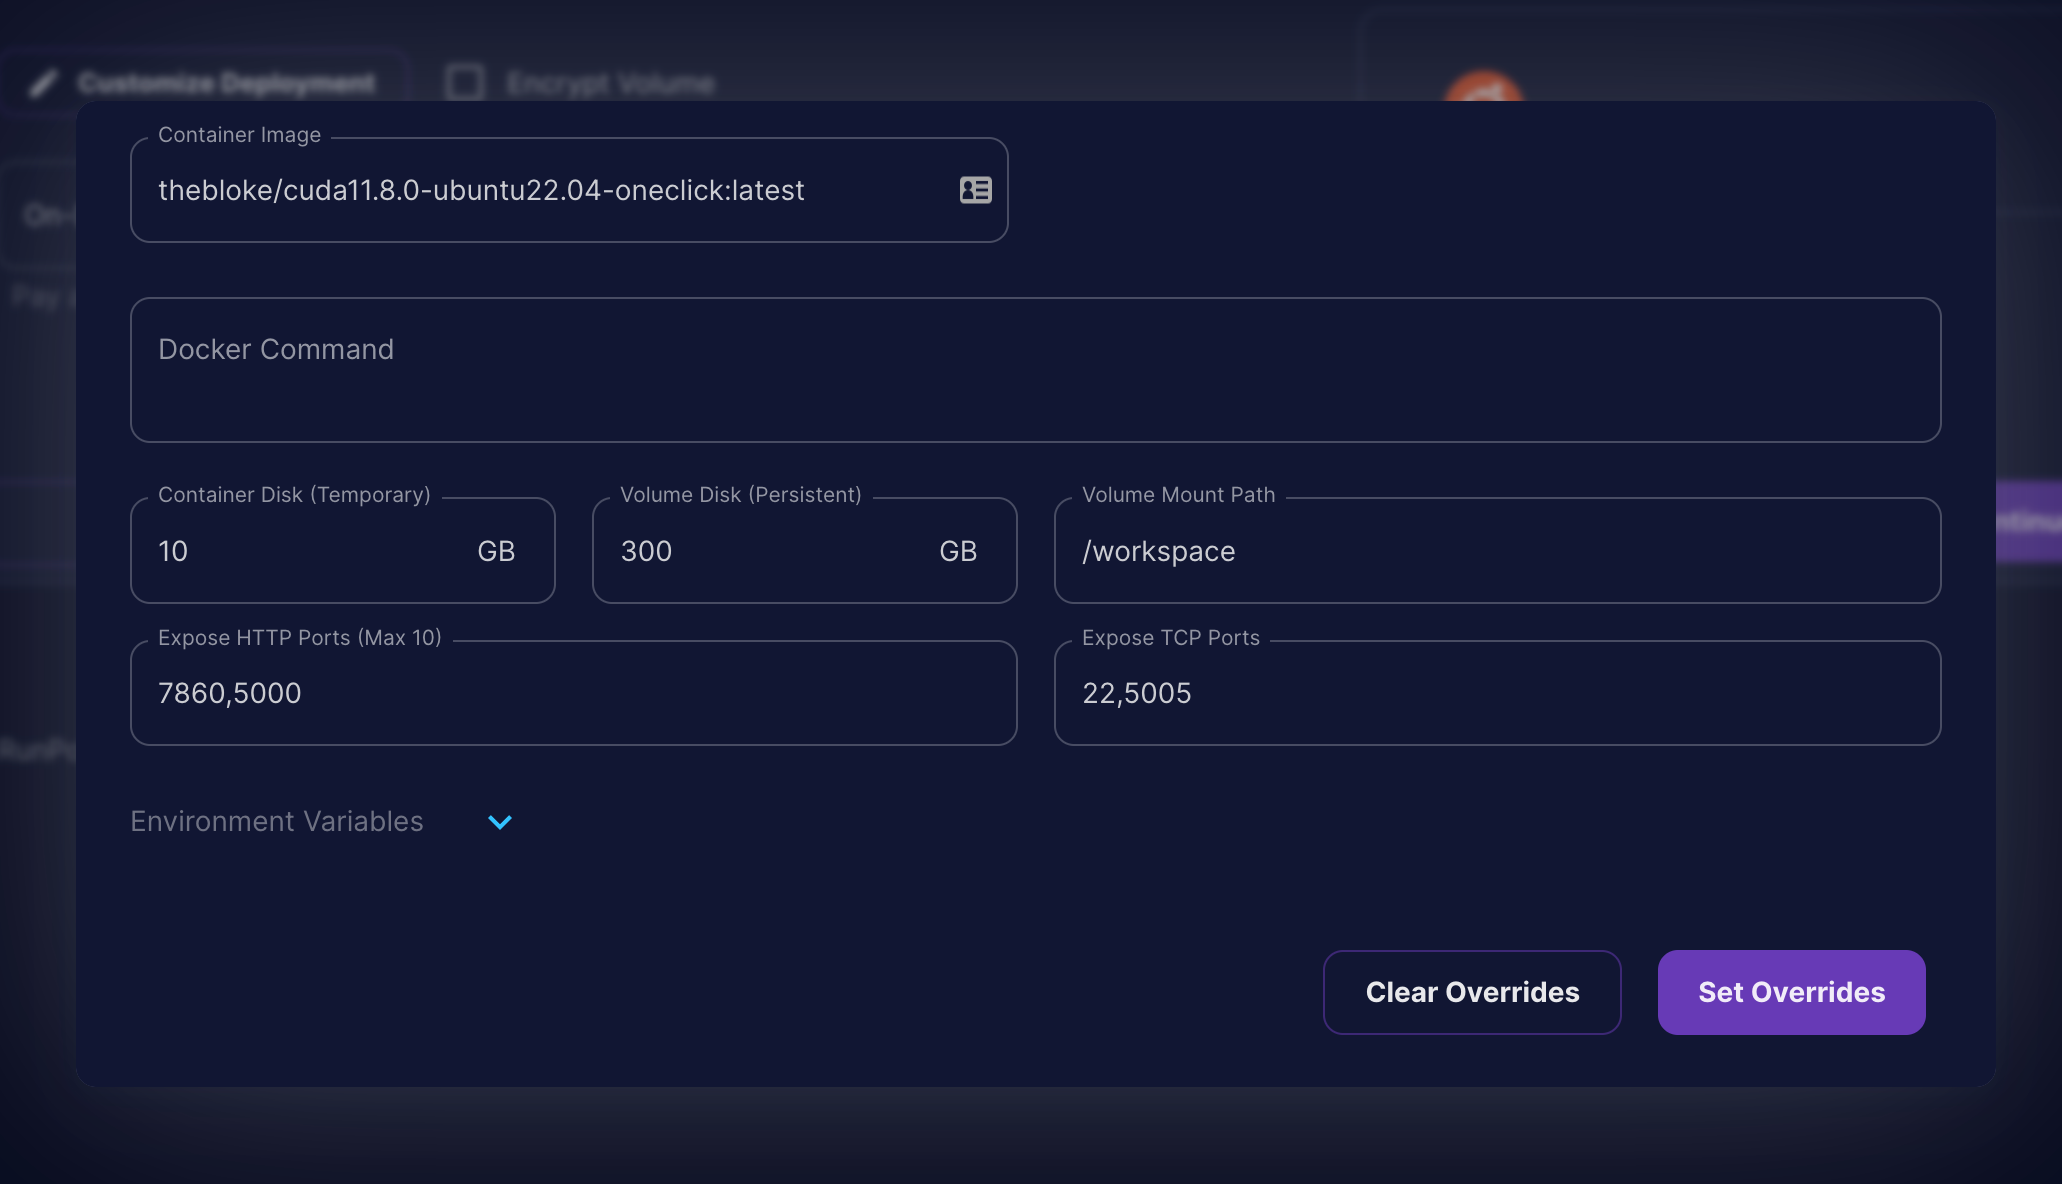
- Once, you have made the changes click on
Set Overridesand clickContinue.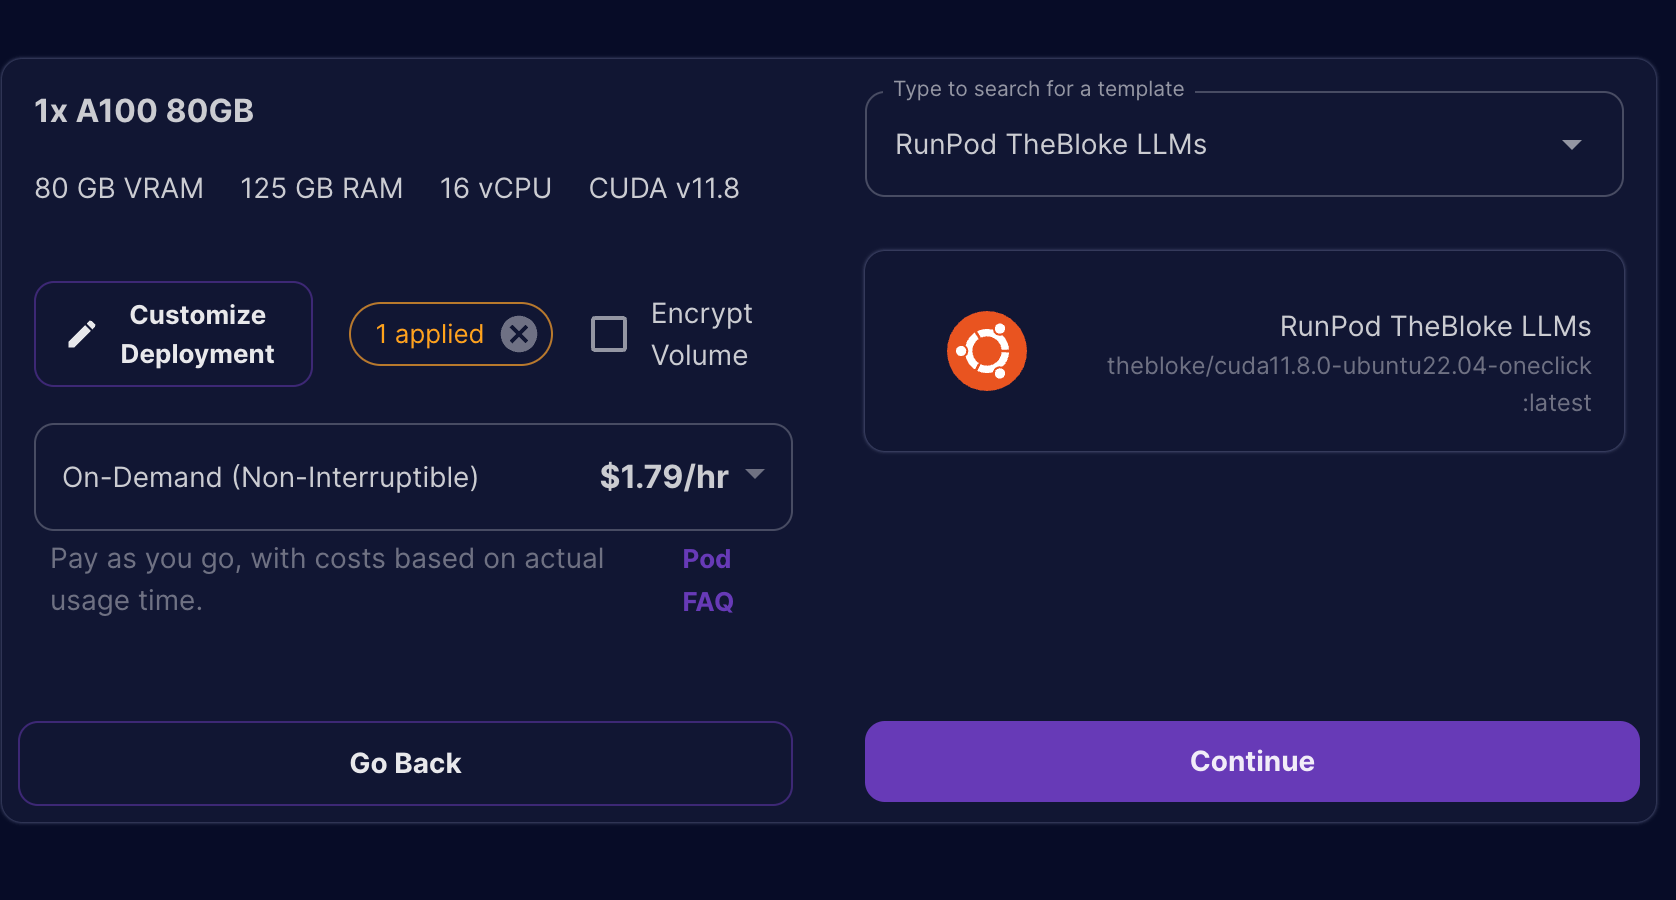
- This will bring you to the final summary screen before we can deploy our server. Click on the
Deploybutton to provision the server.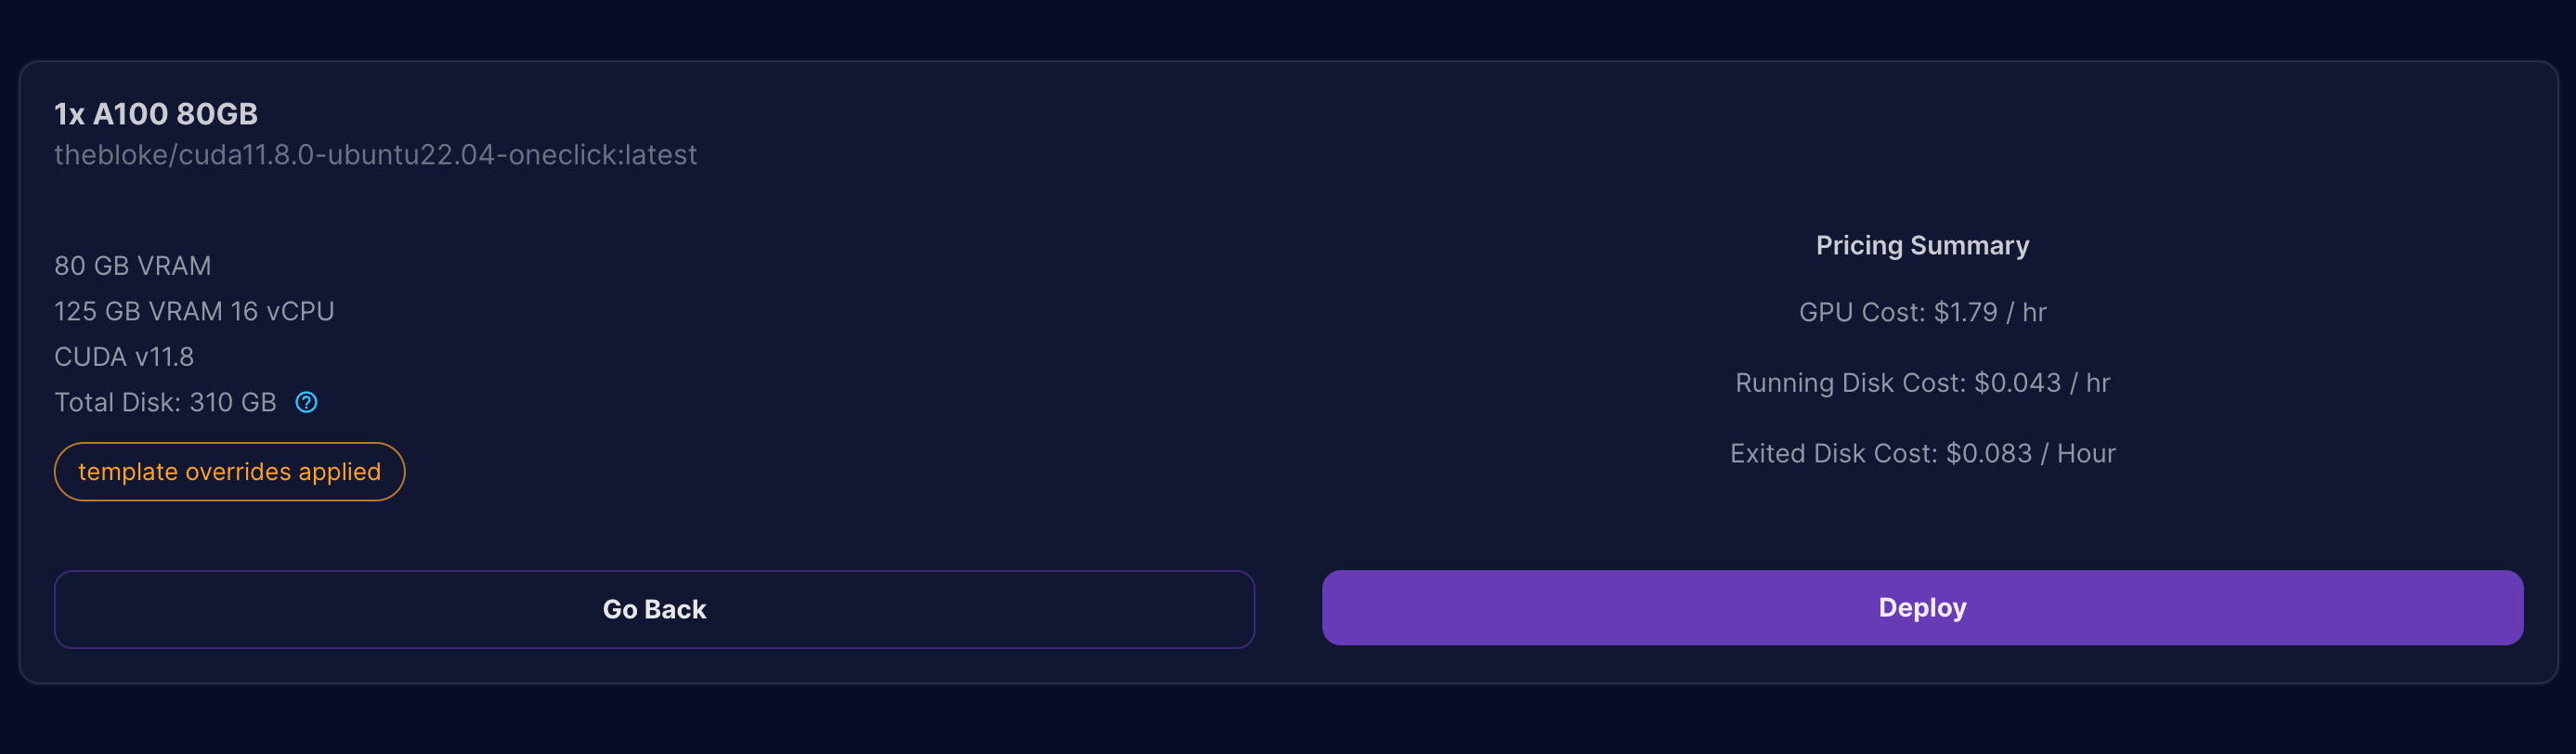
- To access your running server, go to your Runpod Dashboard and click on the
ConnectButton on the Pod Instance.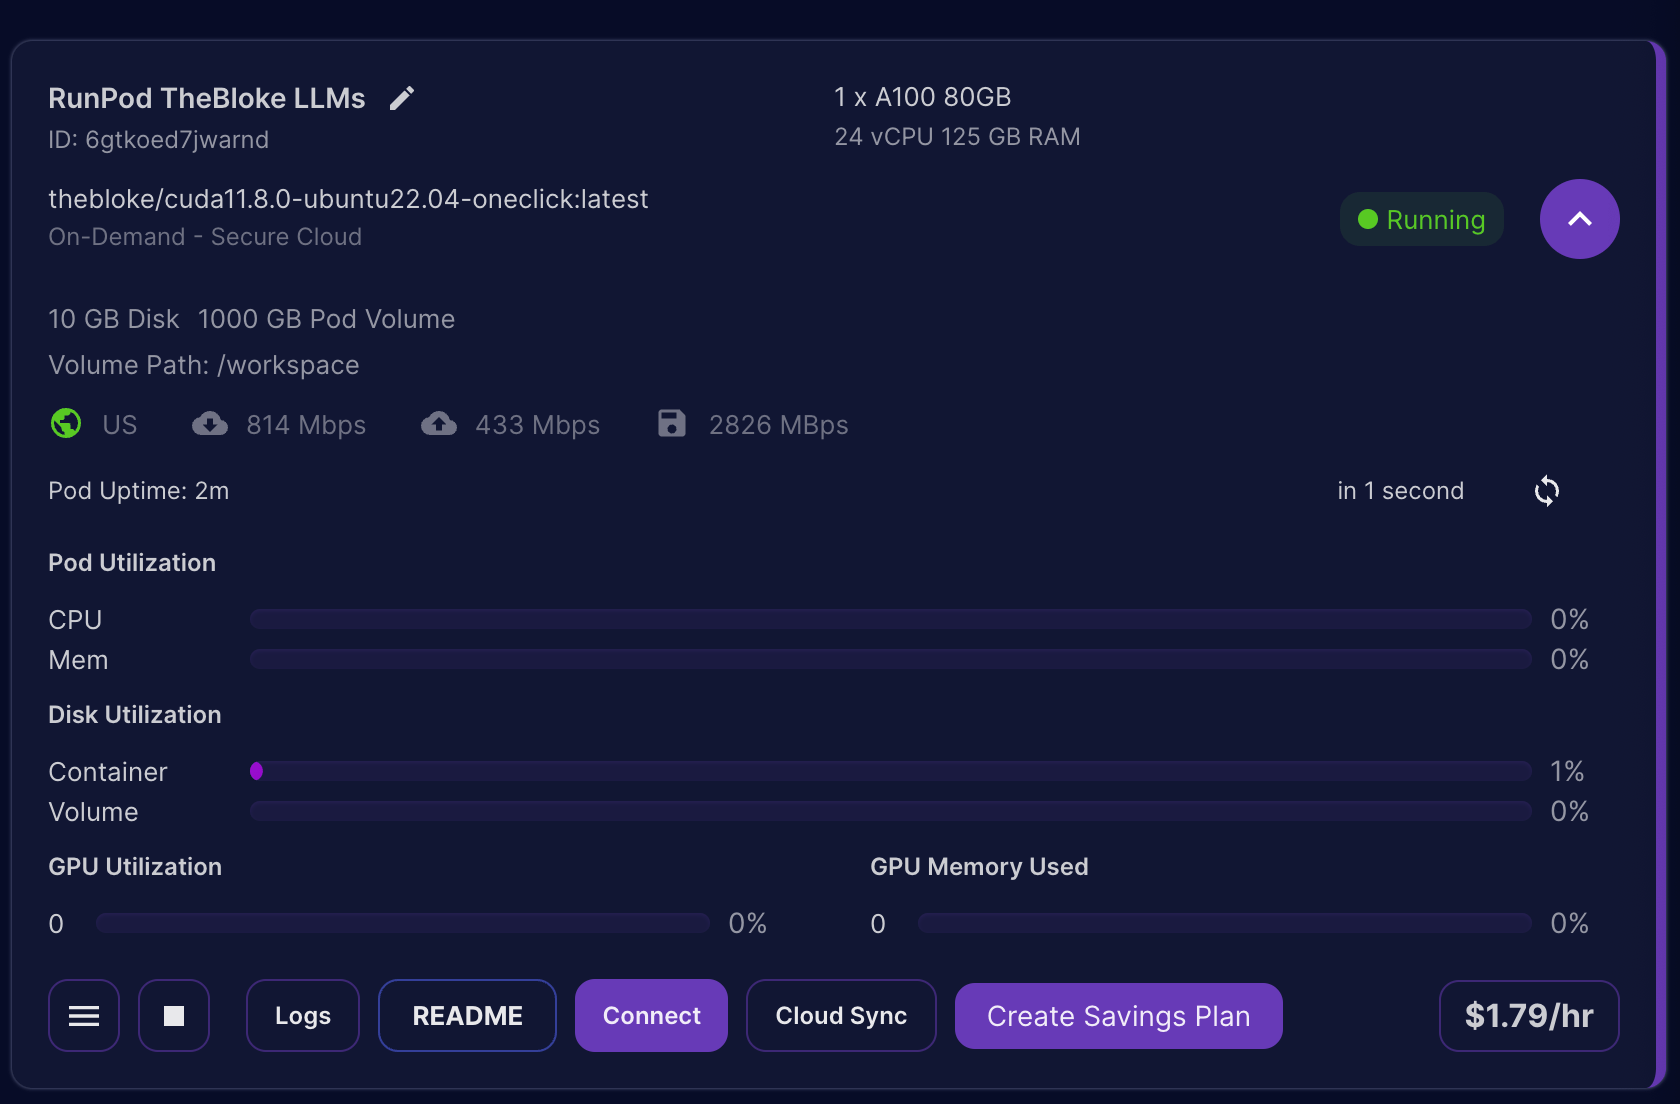
- The template we used starts Oobabooga’s Text Generation WebUI and starts serving on the
port:7860of the deployed server. When you click onConnect, you can see the following options in the list.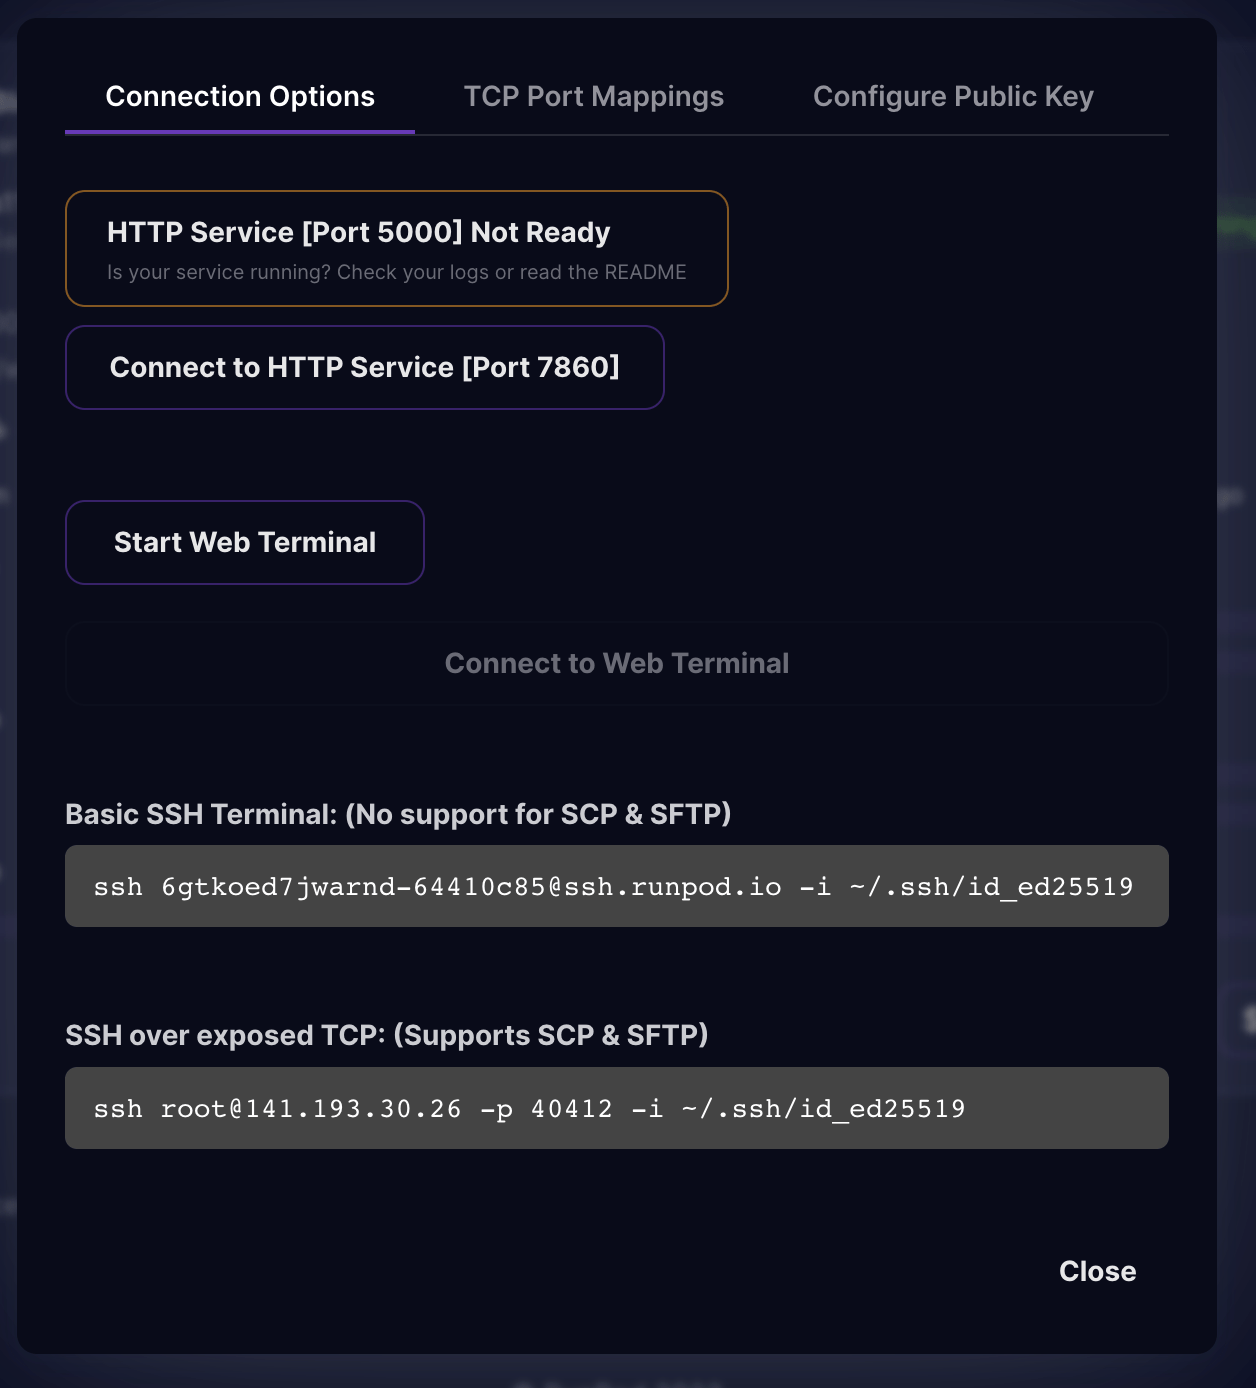
- Click on the
Connect to HTTP Service [Port 7860]and it will open up another tab on your browser with the Text Generation WebUI running on your deployed server.
- To deploy our Falcon-40B models, we will first need to download the models. First, go to the
ModelTab located at the top of the application. You will find the following similar interface.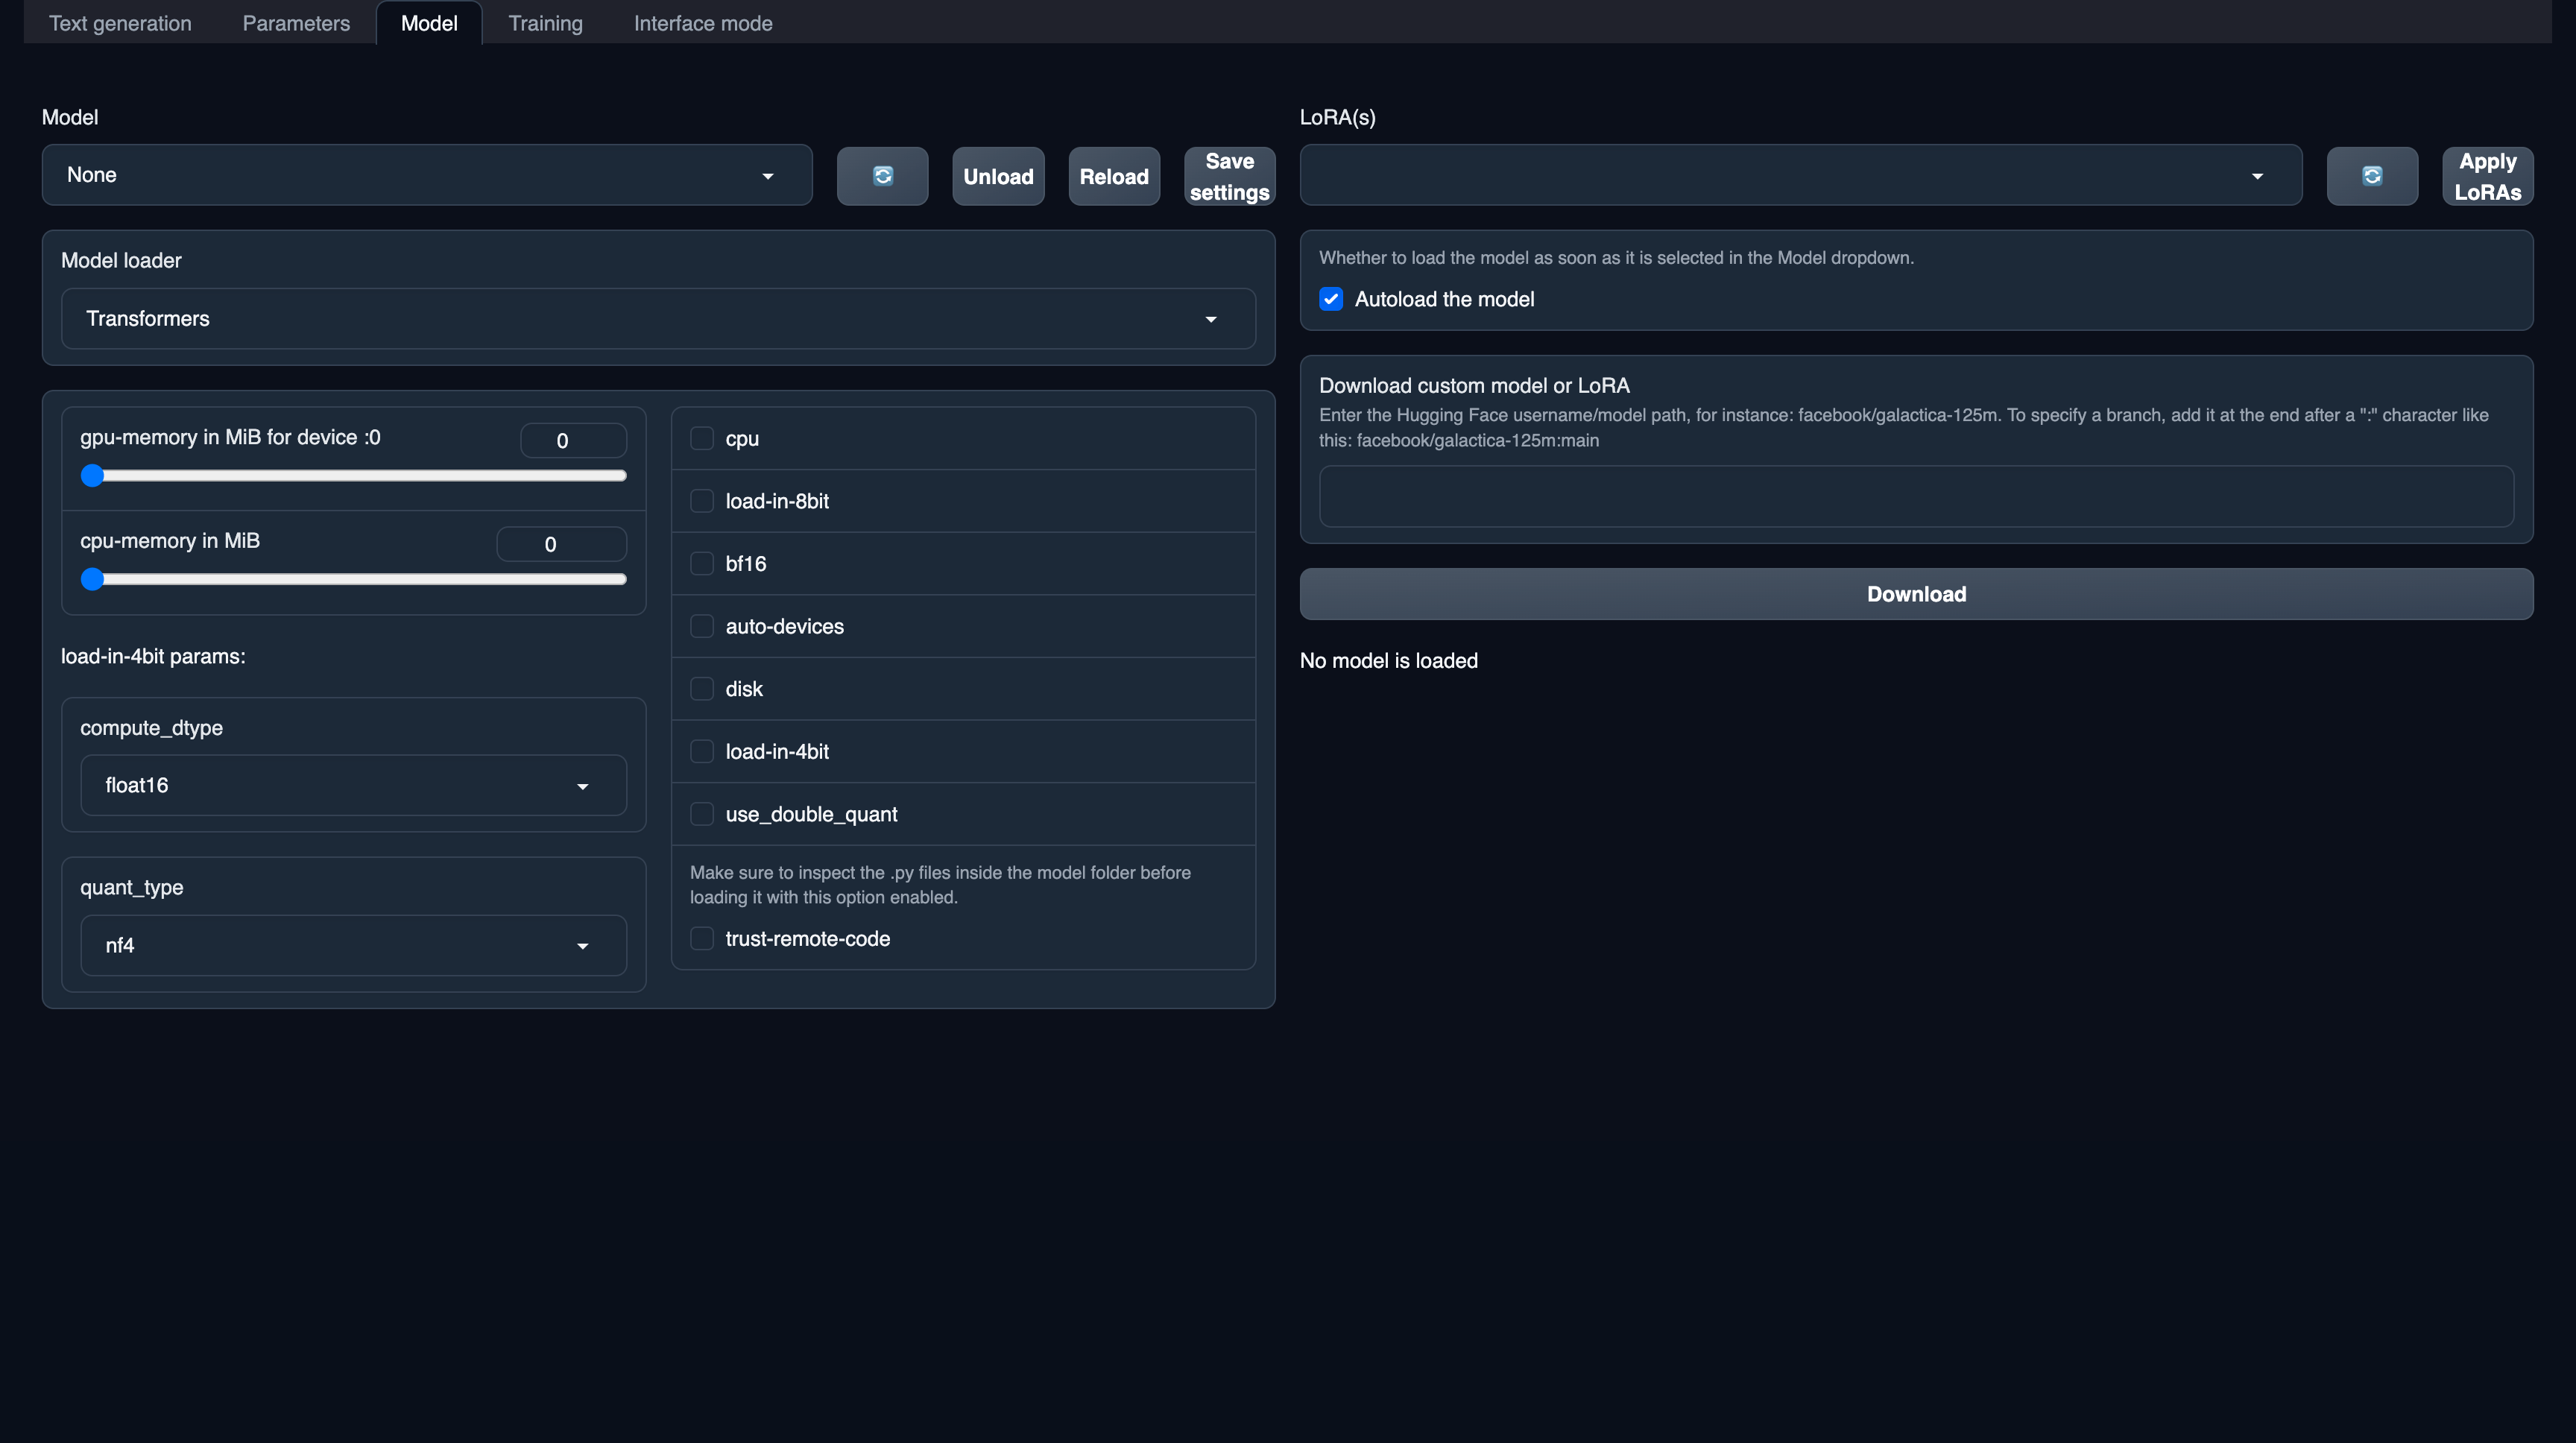
- To download the model, you can type the Hugging Face model IDs of the respective model you would like to run. We are going to use the following models from Hugging Face:
- Falcon-40B – tiiuae/falcon-40b
- Falcon-40B-Instruct – tiiuae/falcon-40b-instruct
- Falcon-40B-Uncensored – ehartford/WizardLM-Uncensored-Falcon-40b
- Type the model ID on the download panel and click on download. It will take some time to load the models.
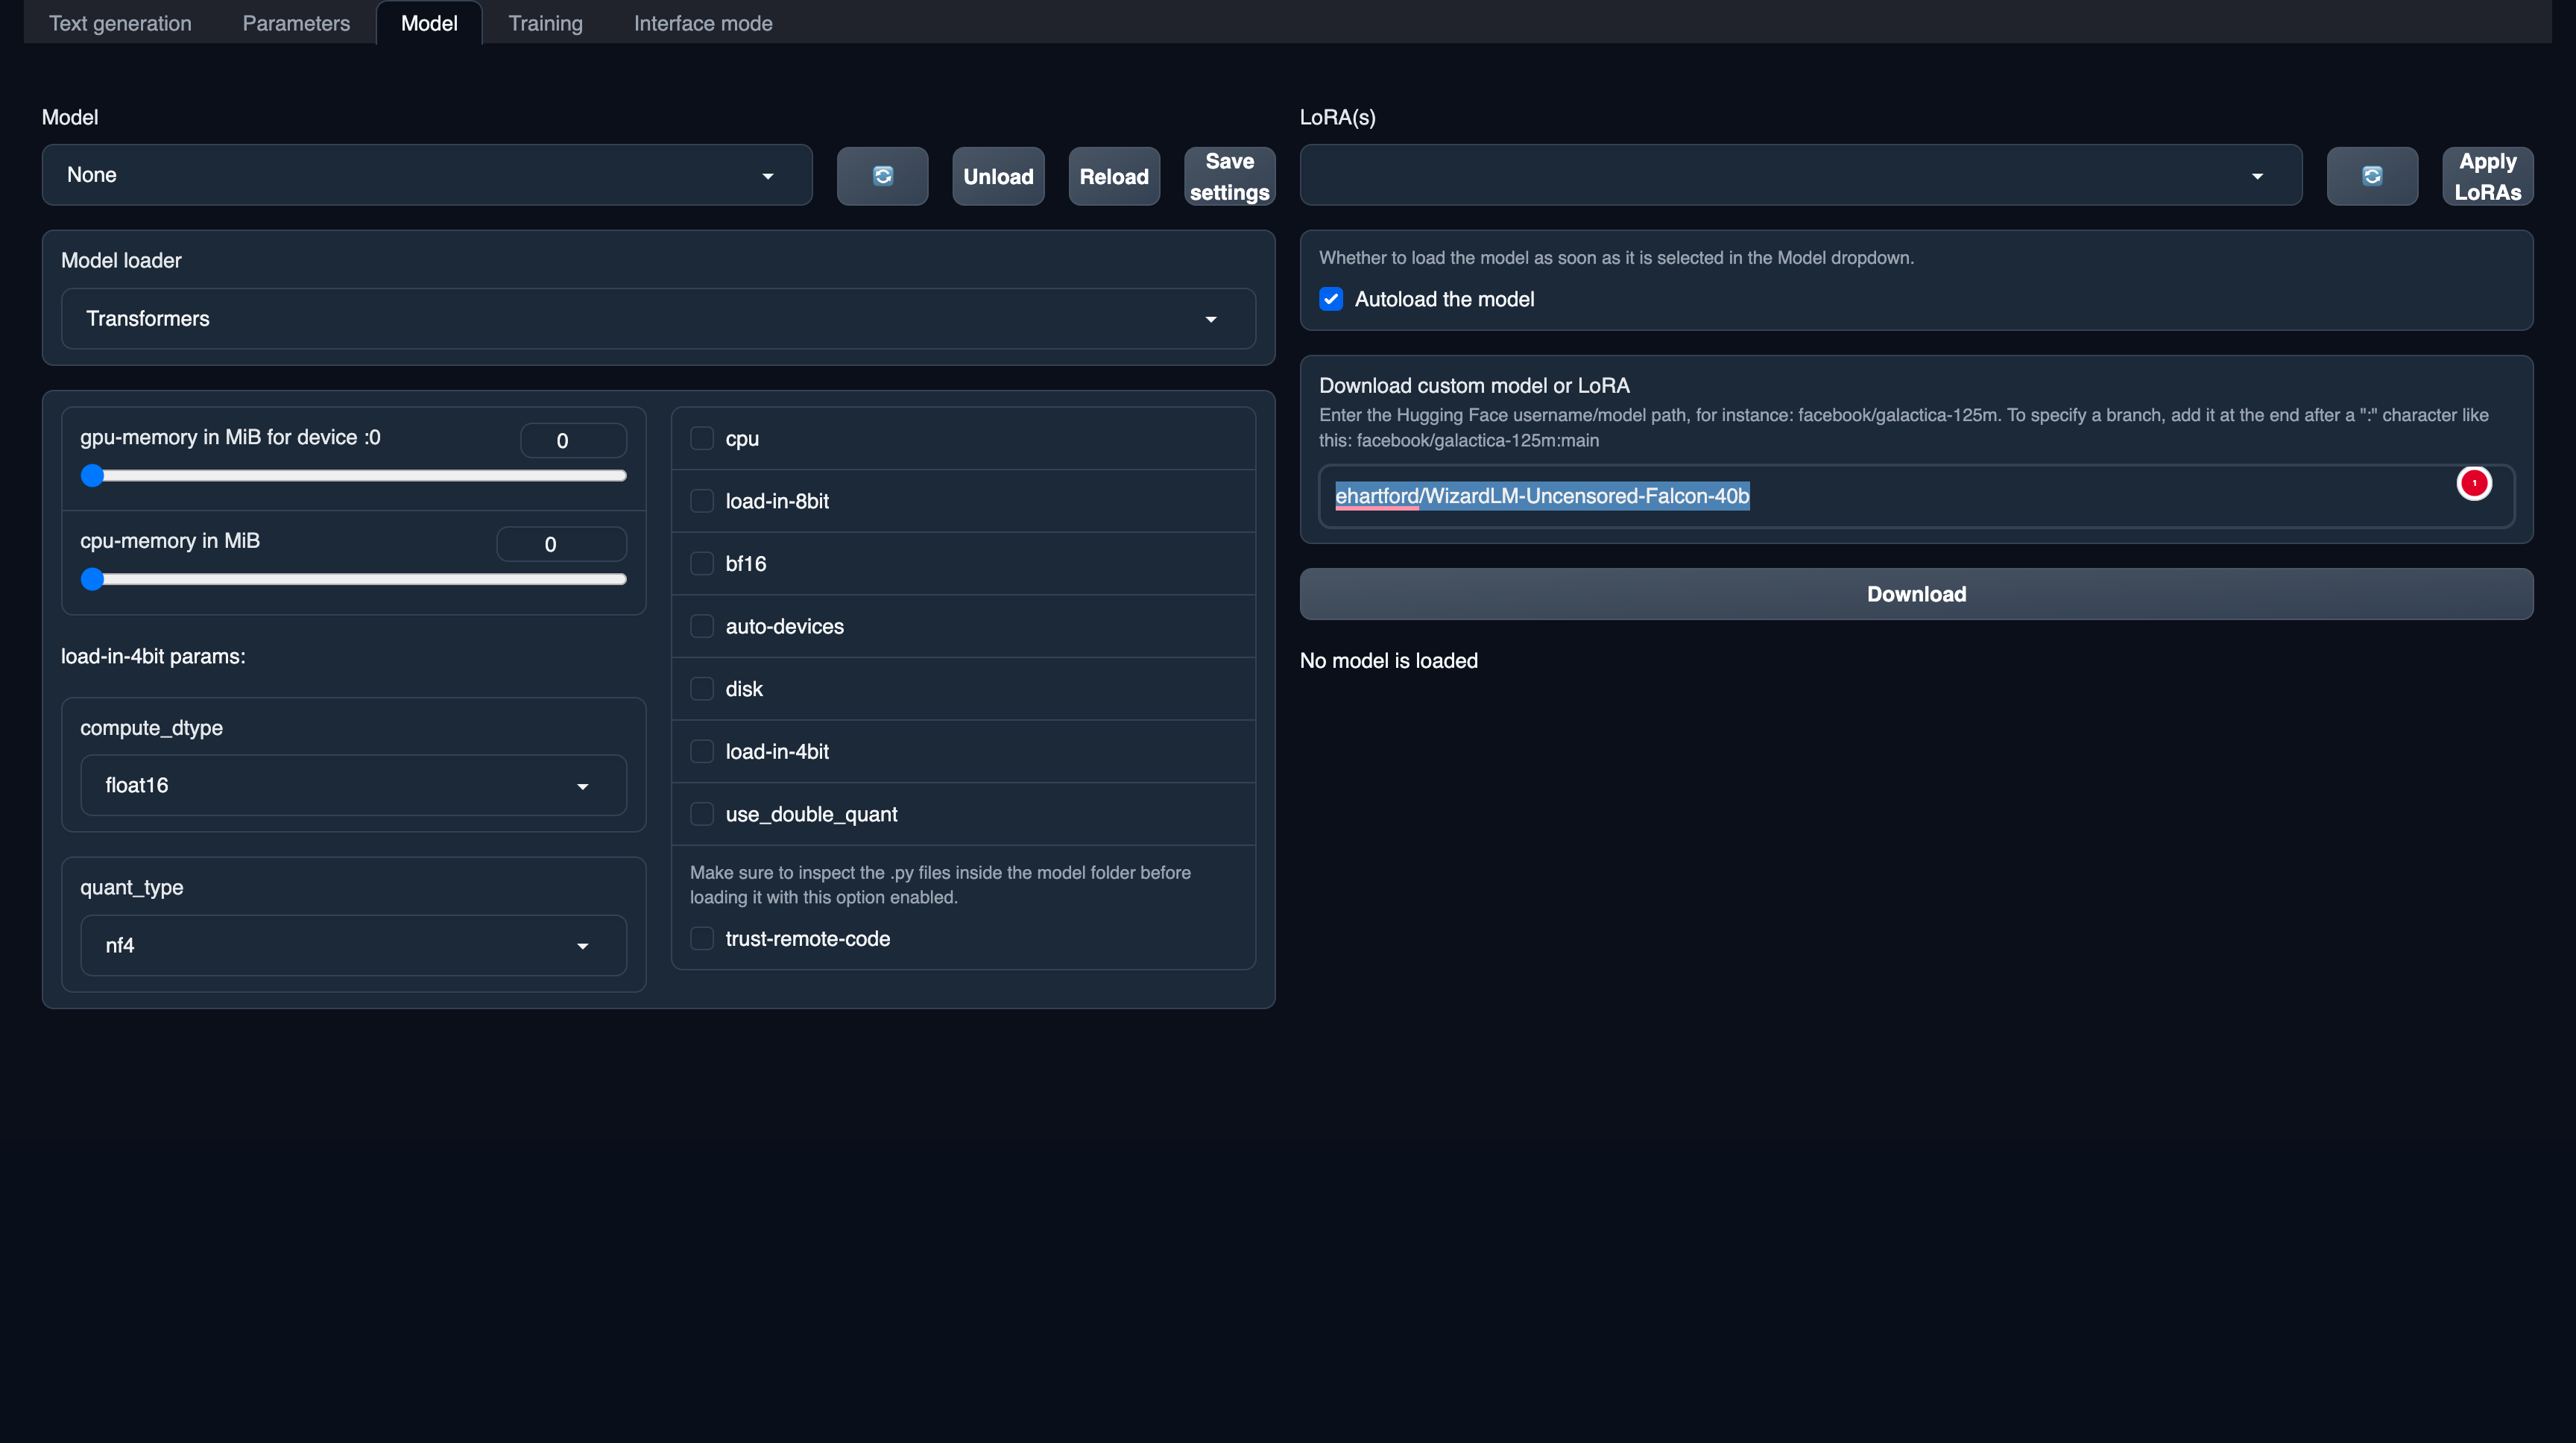
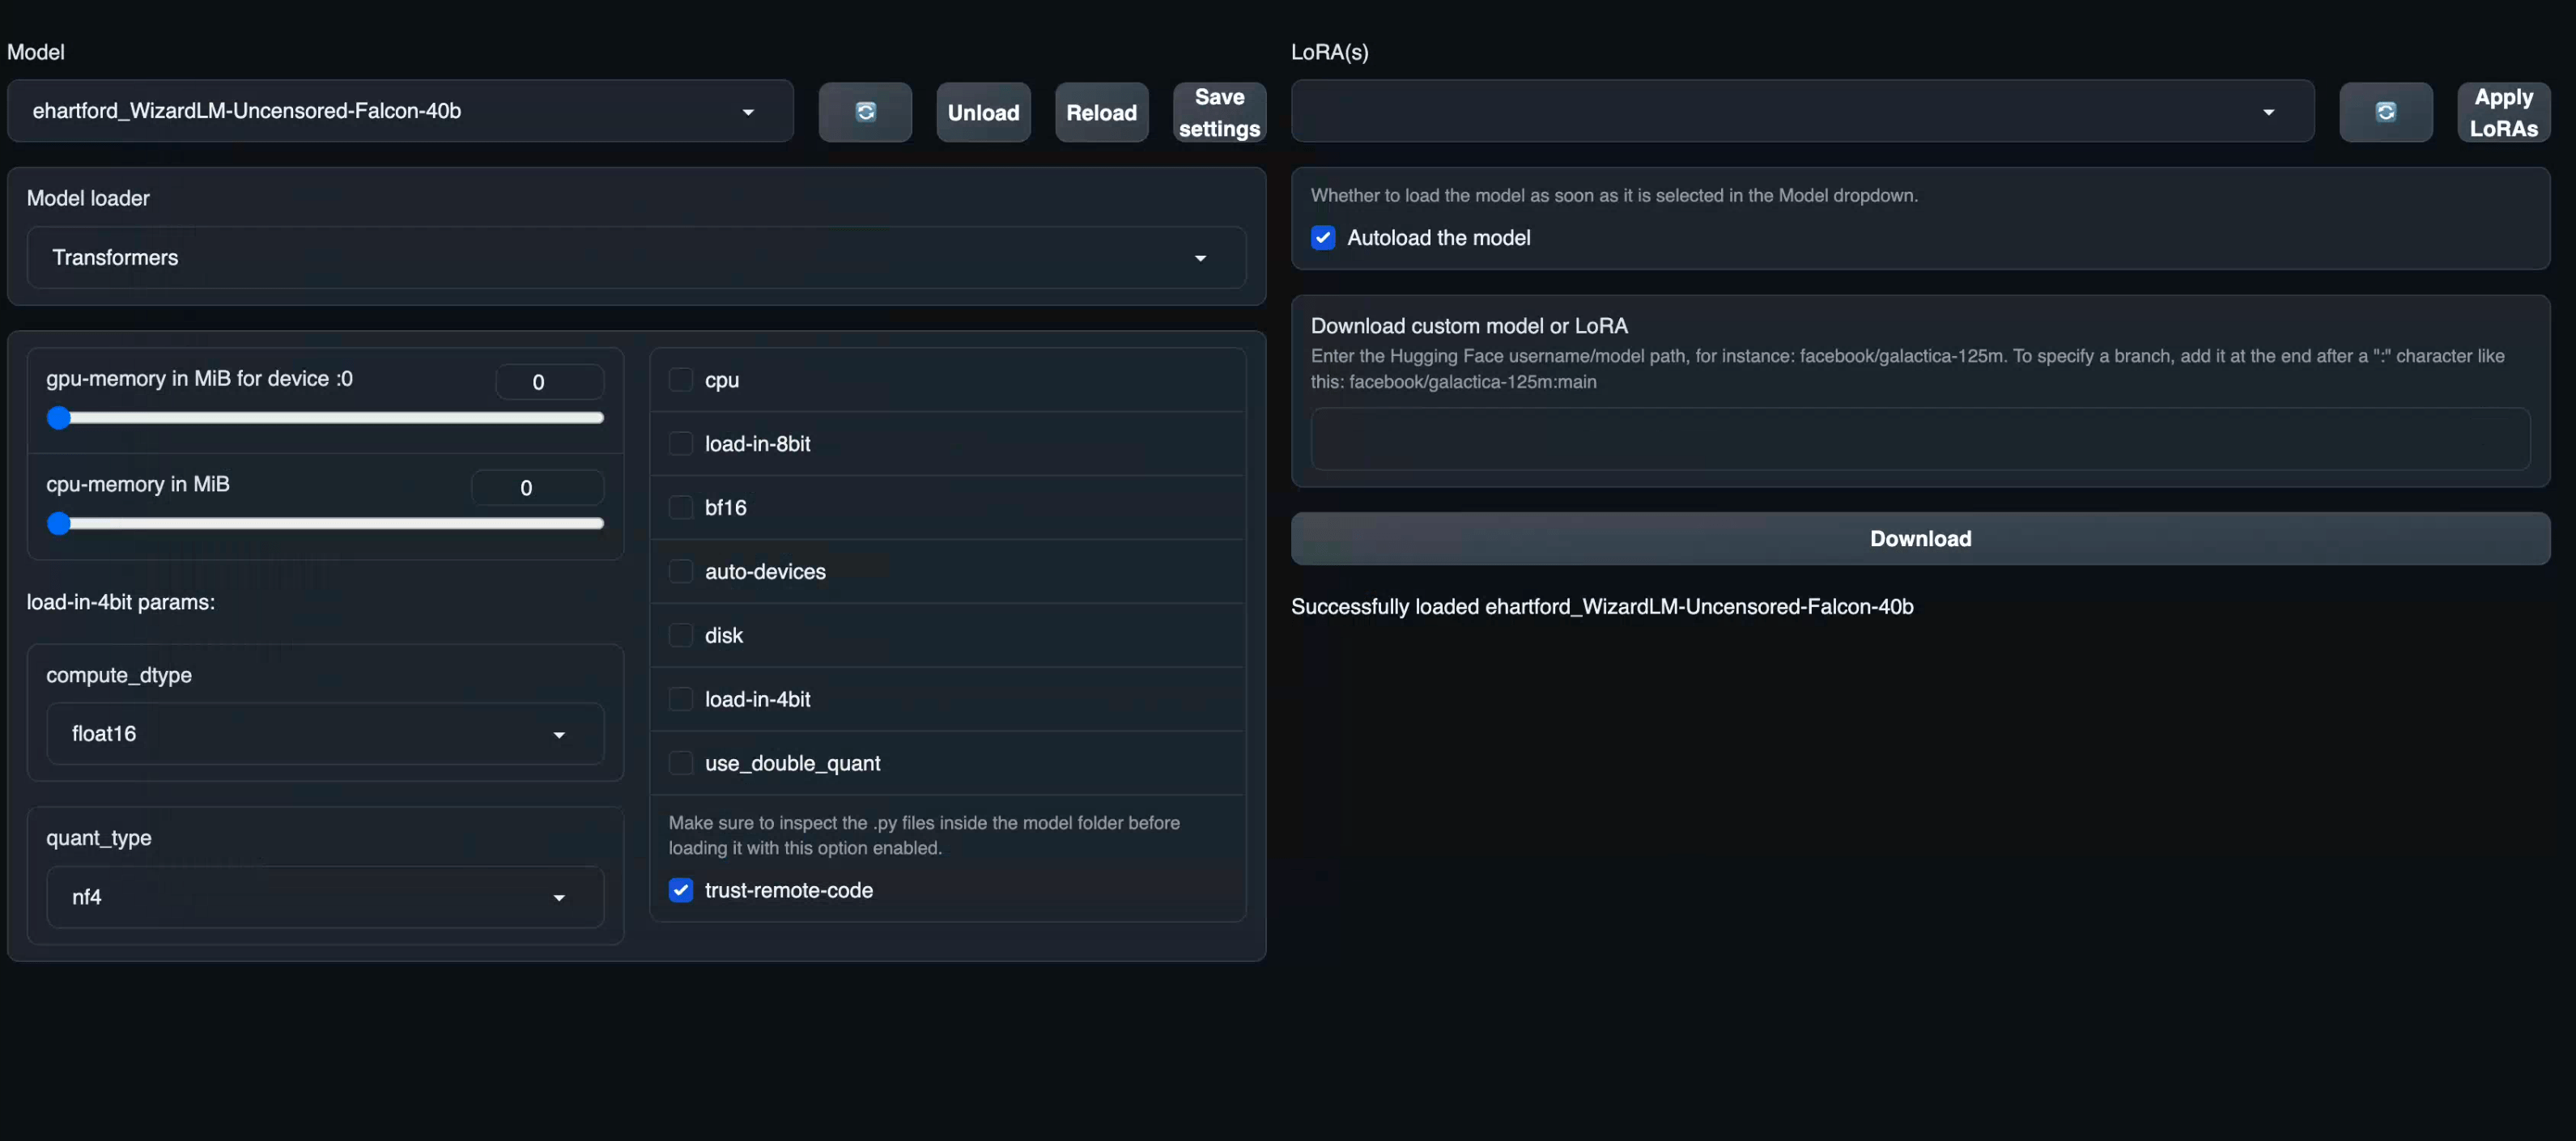
trust-remote-code option on the model options.

Model Dropdown. This will refresh the installed models. Your newly downloaded should now be reflected. Click on your newly installed model and it should automatically start loading the model. Once, it’s done it will show “Model successfully loaded”.
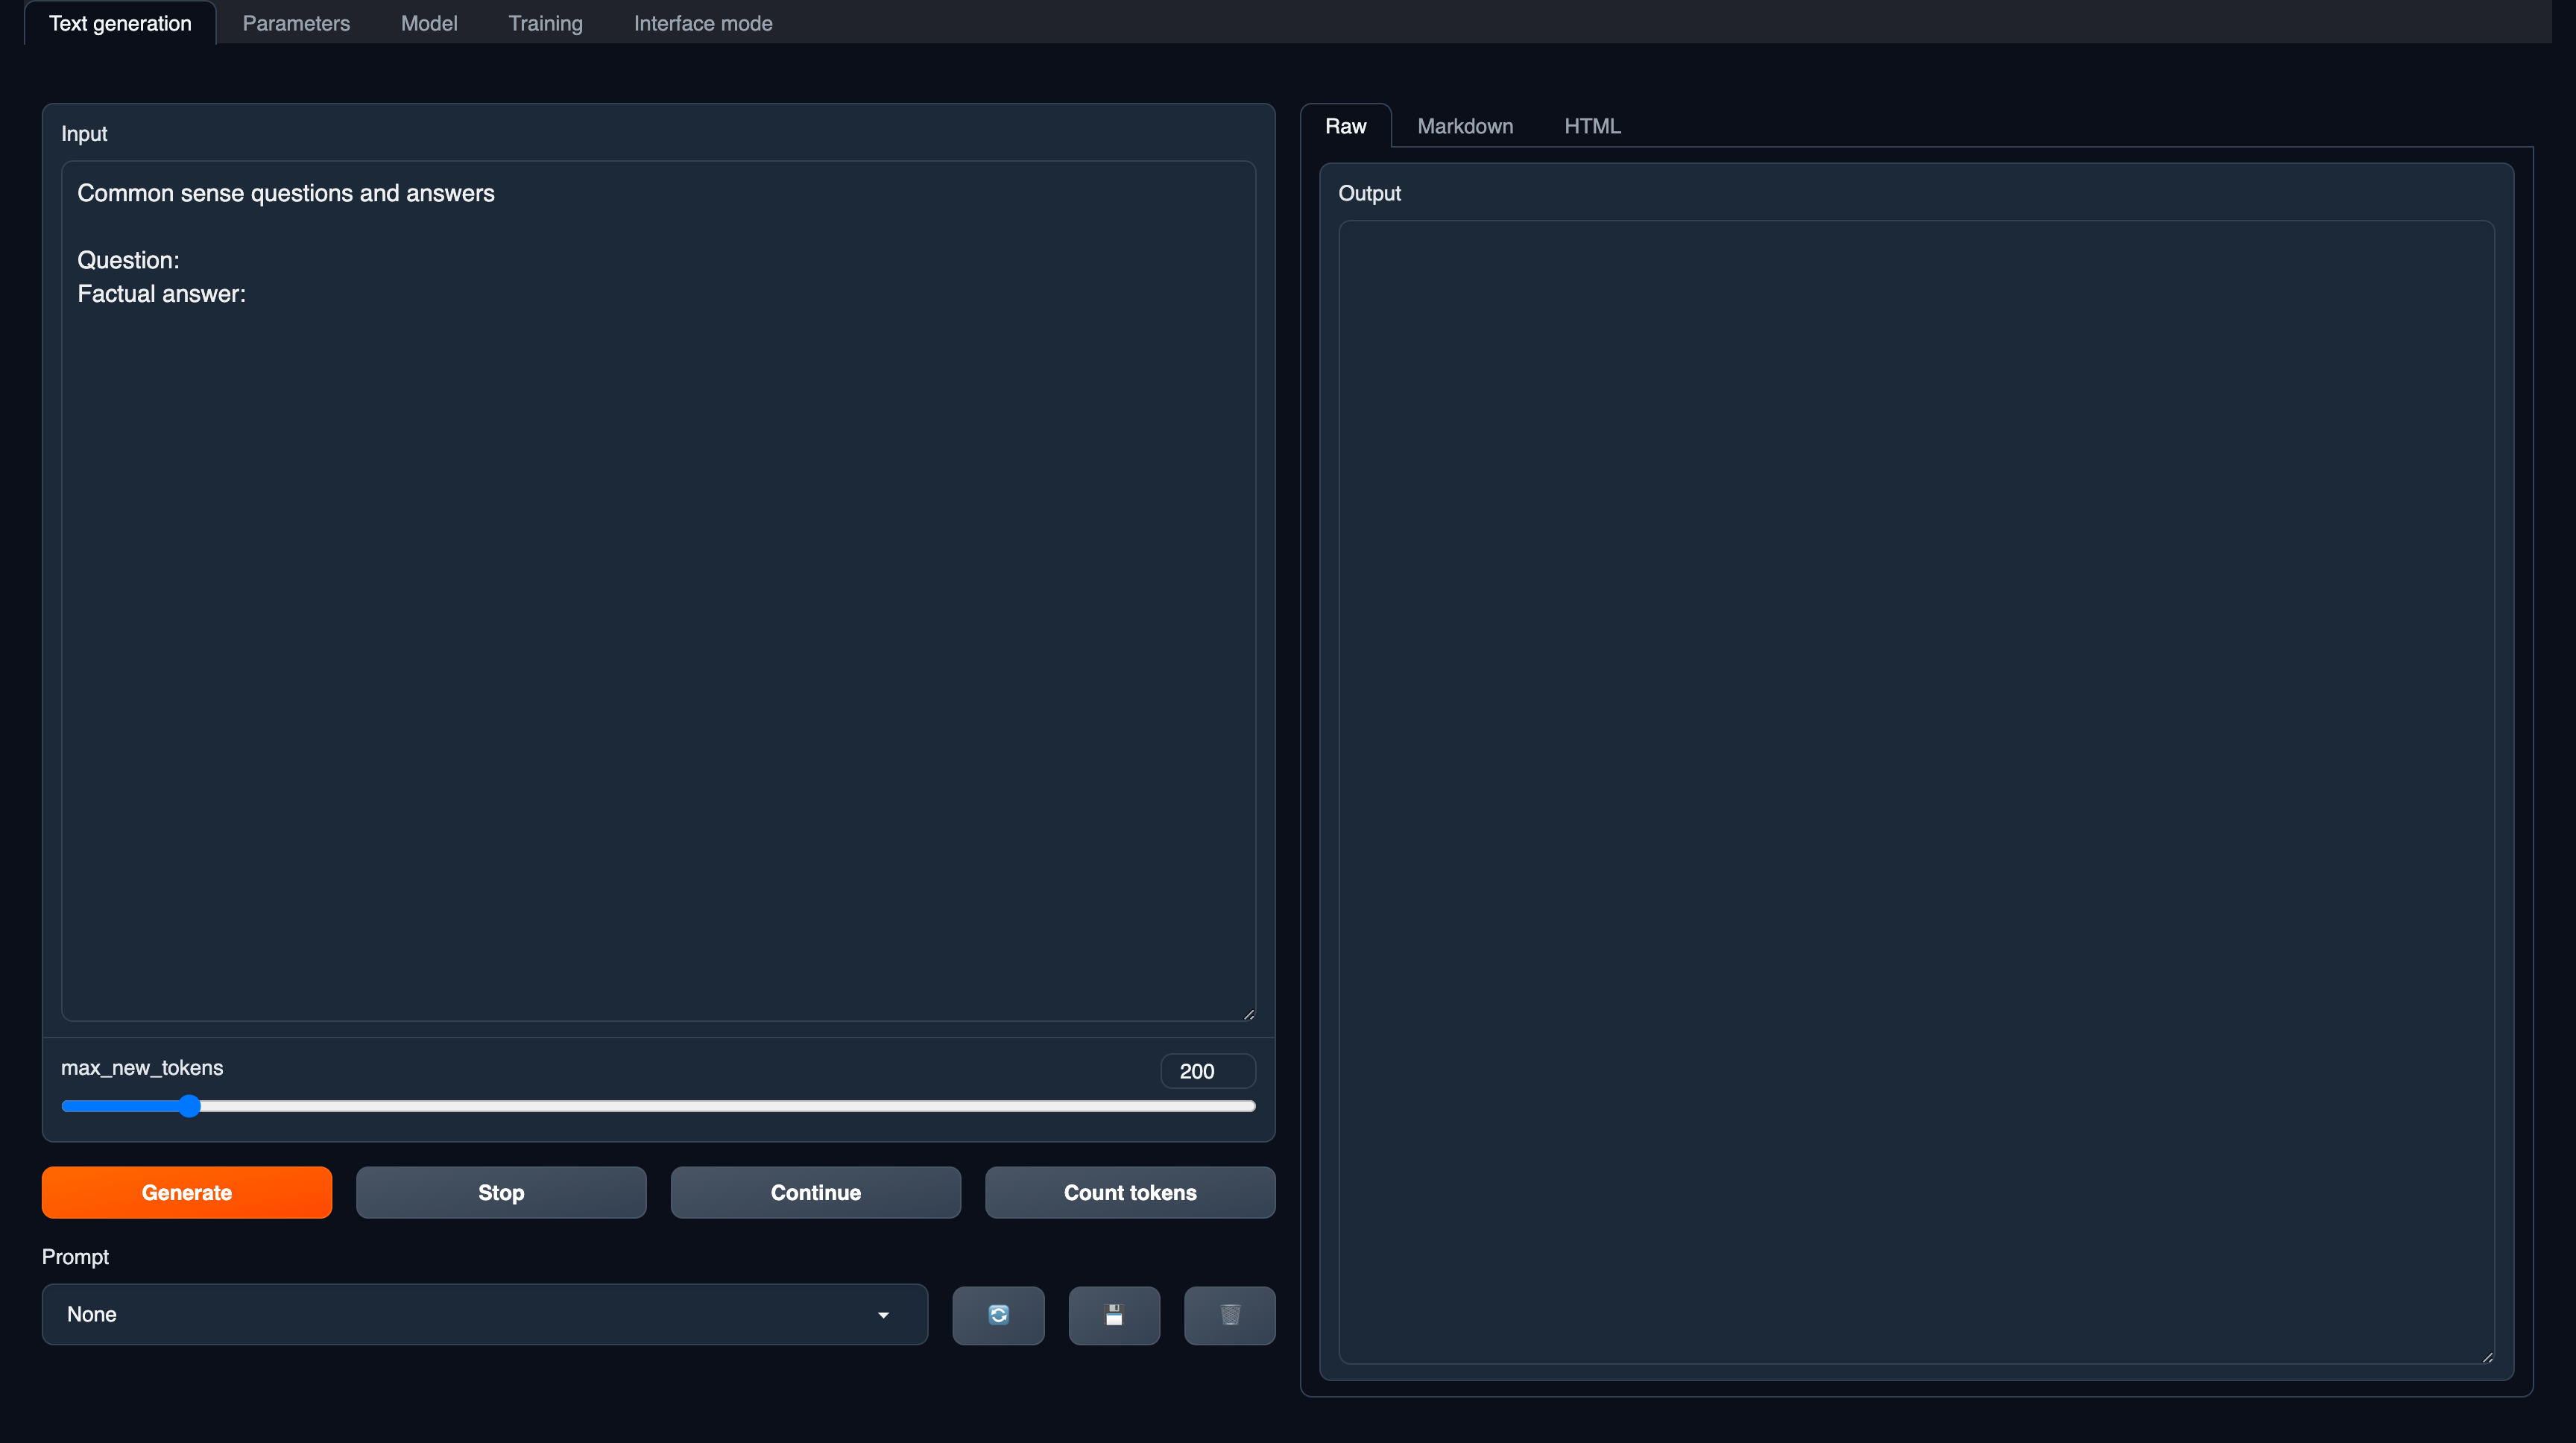
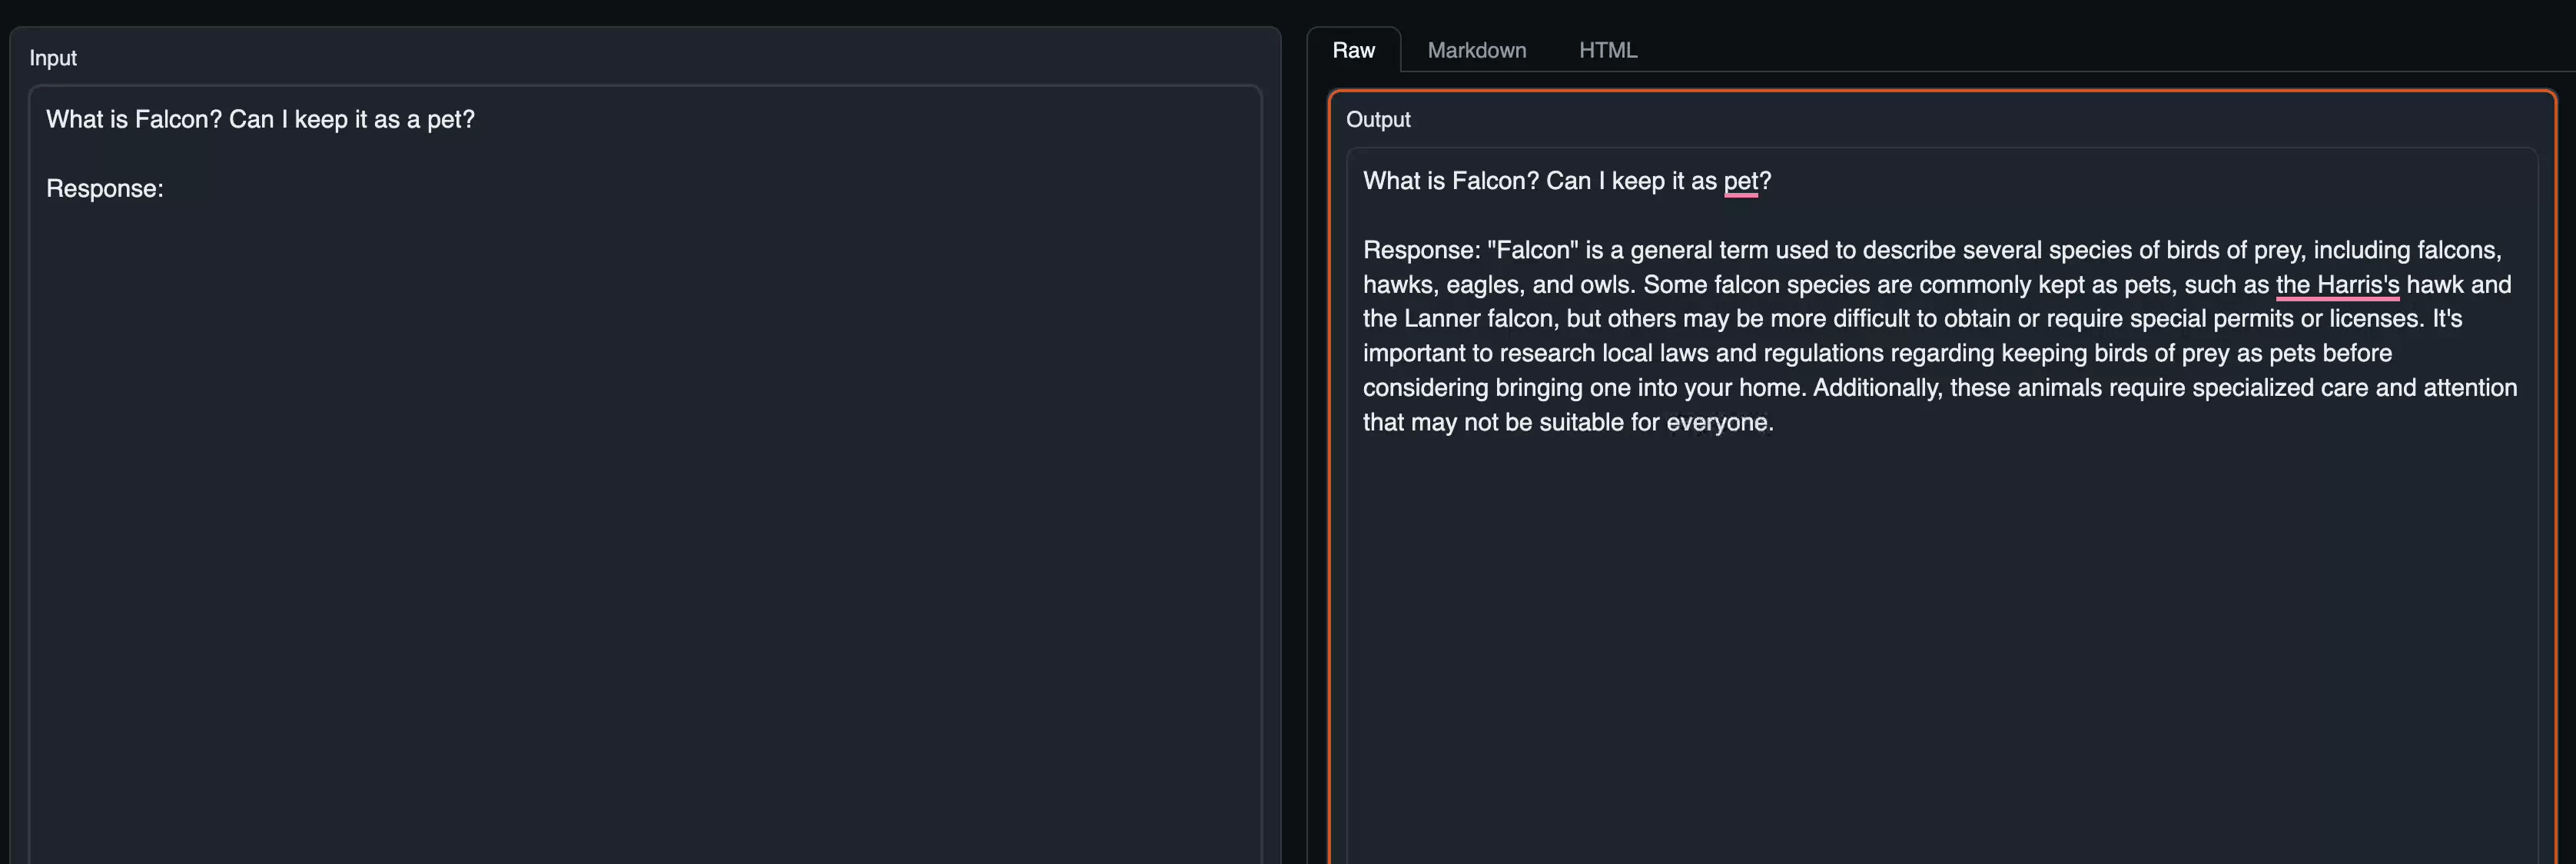
Text Generation and start asking questions as follows:
Running on Fluidstack #
The process of running the model on Fluidstack is similar for Falcon-40B and Falcon-40B-Instruct. While, for Falcon-40-Uncensored, we will be using a different command for getting it up and running. You can follow the video tutorial covering deploying Falcon-40B below to get started.
Steps to deploy Falcon-40B Family on Fluidstack #
The steps for deploying all models are as follows:
- Sign up for FluidStack
- Add $10 to your balance
- Go to the console and select
Ubuntu 20.04(AI/ML)image.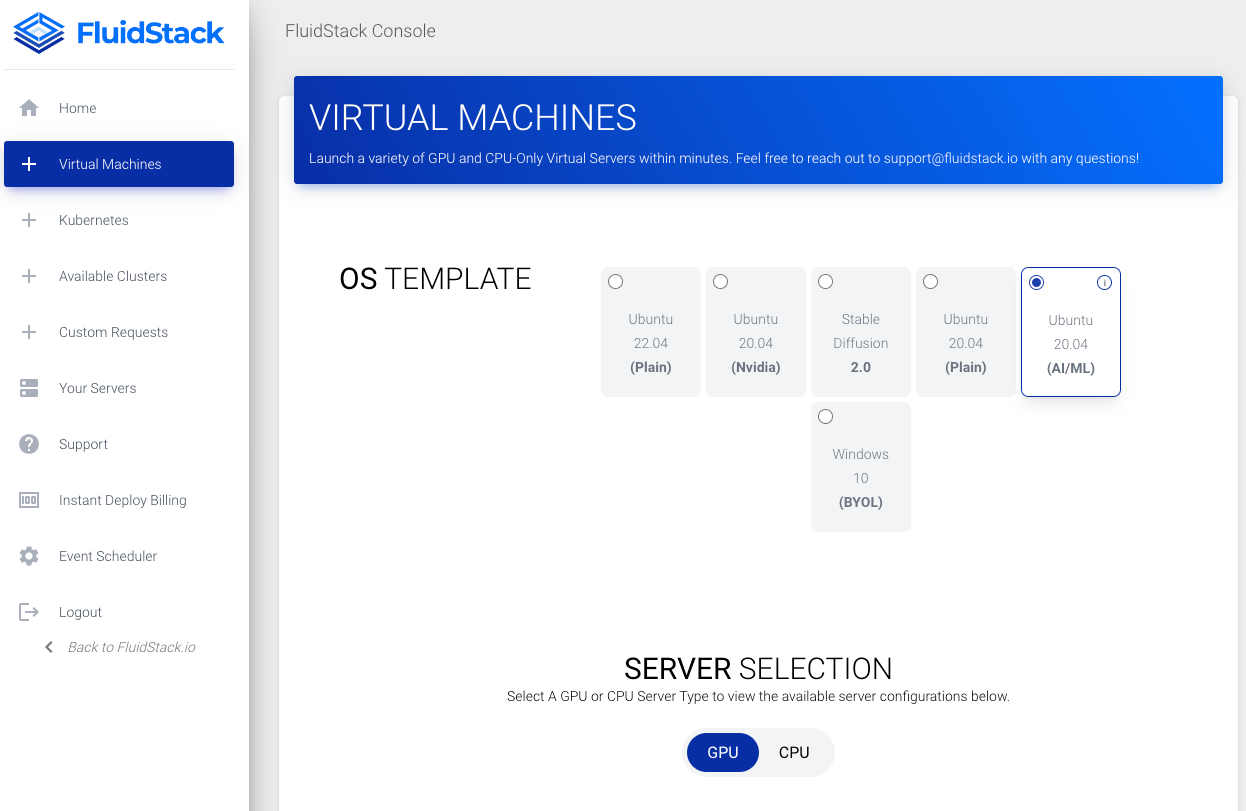
- Select the
RTX A6000 48GBinstance and select2GPUs per Server from the dropdown. The instance where preconfigured servers are usually the lowest in price and you can recognise by checking the deployment time which is usually 15-20 minutes.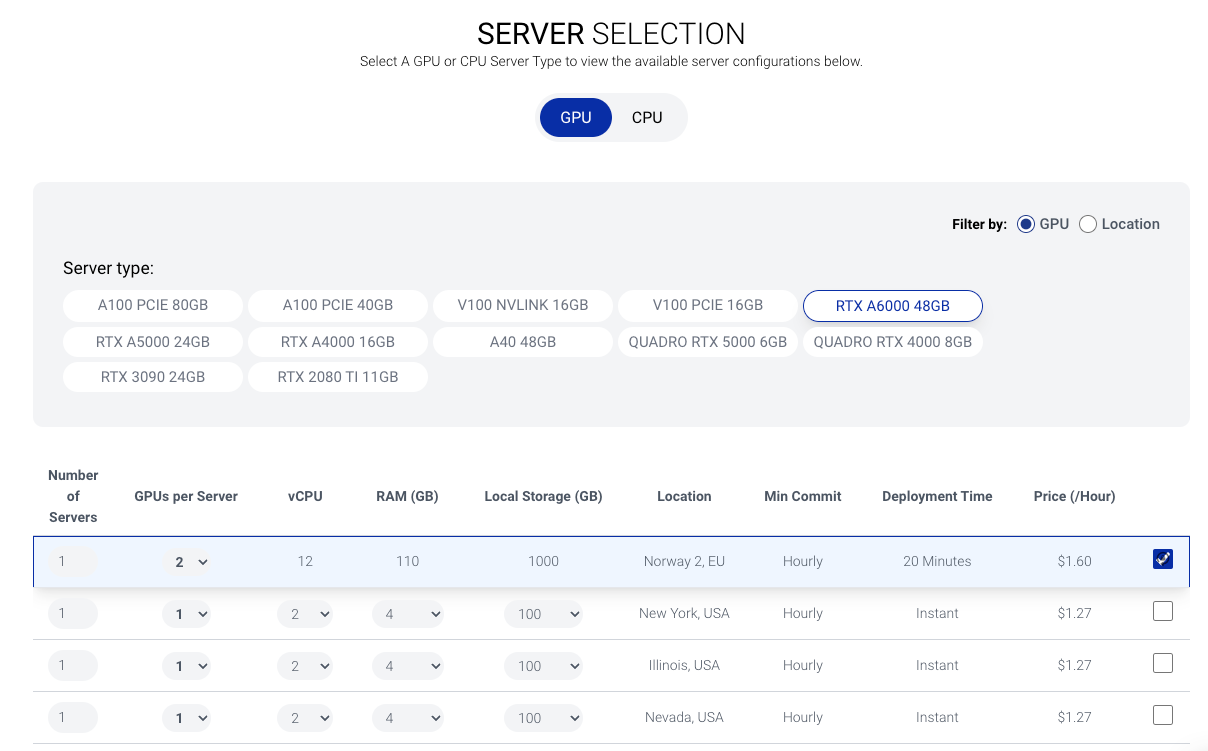
- Next, keep the username as
fsuser. This will be the username you will use to login into the server. Add the SSH Public Key to the server. If you don’t have an SSH Key. Select the commitment asOn Demand.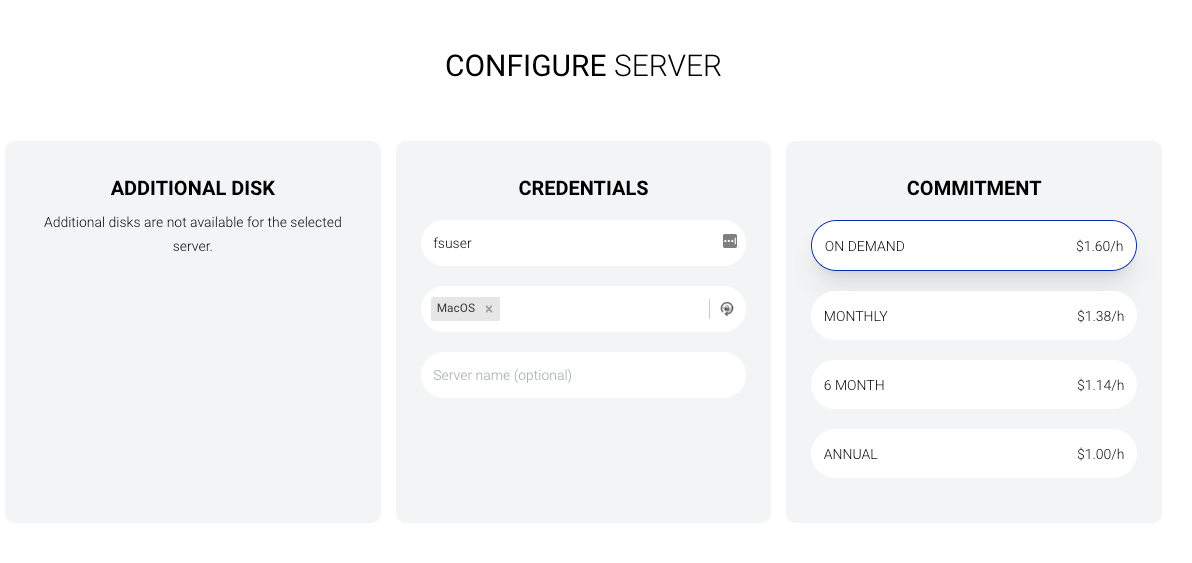
- Review the summary page to make sure everything is correct and click on
Deployto provision the server.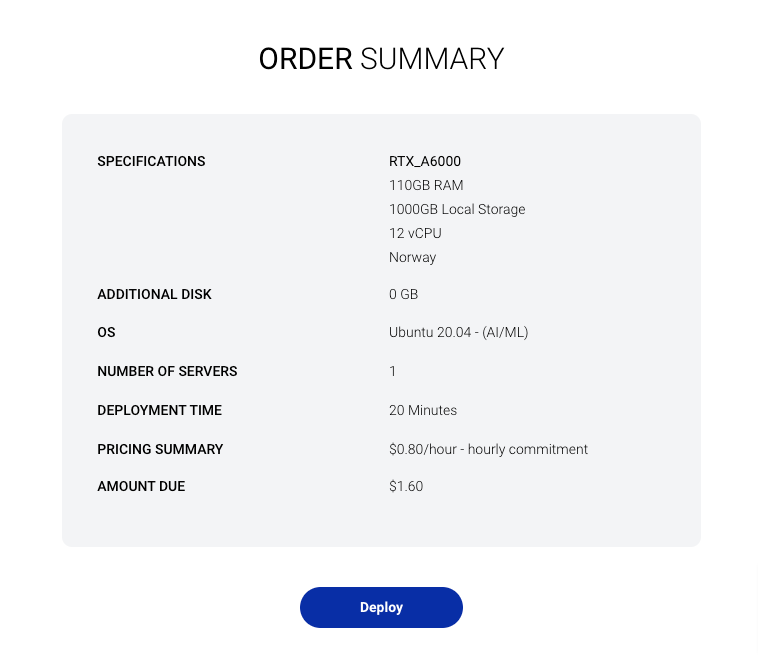
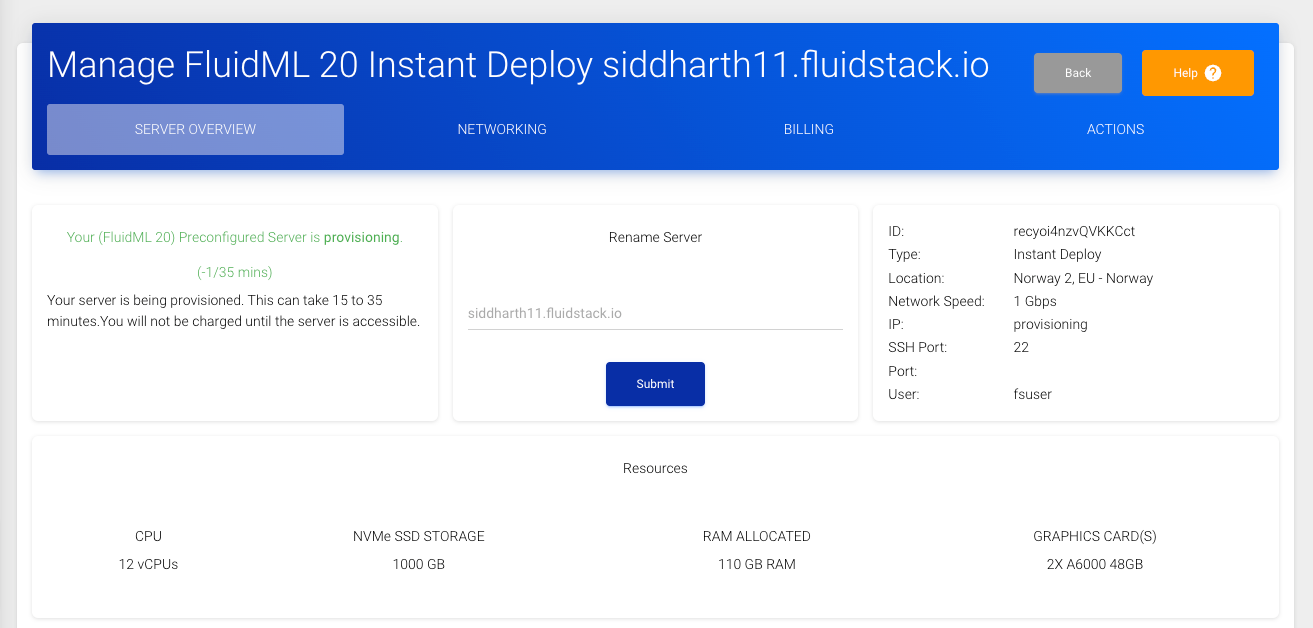
- The server will take around 15-20 minutes to provision. Once, the server is ready, fluidstack will assign an IP that you can use connect to the server using
ssh.
- Once, the server is ready, we can connect to the server using the following
sshcommand. Here theserver-ipis the IP address of the server provisioned by Fluidstack.
ssh -i <path-to-your-private-key> fsuser@<server-ip>
Note that the username is fsuser as we configured while provisioning the server and not ubuntu or root.
- While in the server, create a new project directory, where we will store the data for the model and change the directory to it.
For different models, we will be using different directories. For instance, for Falcon-40B-instruct, we will be using the
falcon-40b-instructdirectory.
mkdir falcon-40b-instruct
cd falcon-40b-instruct
-
Now, we can directly start running the model using Text Generation Inference from Hugging Face.
-
To run the Falcon-40B family, we can use the following commands:
- For the Falcon-40B model, we can use the following command.
sudo docker run --gpus all --shm-size 1g -p 8080:80 -v $PWD/data:/data ghcr.io/huggingface/text-generation-inference:latest --model-id tiiuae/falcon-40b --max-input-length 2048 --max-total-tokens 3072 --num-shard=2 --sharded=true
- For the Falcon-40B-Instruct model, we can use the following command.
sudo docker run --gpus all --shm-size 1g -p 8080:80 -v $PWD/data:/data ghcr.io/huggingface/text-generation-inference:latest --model-id tiiuae/falcon-40b-instruct --max-input-length 2048 --max-total-tokens 3072 --num-shard=2 --sharded=true
The difference between the commands for the Falcon-40B and Falcon-40B-Instruct is the --model-id parameter.
- While, for the Falcon-40B-Uncensored model, we can use the following command.
sudo docker run --gpus all --shm-size 1g -p 8080:80 -v $PWD/data:/data ghcr.io/huggingface/text-generation-inference:latest --model-id ehartford/WizardLM-Uncensored-Falcon-40b --max-input-length 2048 --max-total-tokens 3072 --quantize bitsandbytes
Here we are using the --quantize parameter to quantize the model to 8-bit and not using the --num-shard and --sharded parameters as the model is not sharded.
-
This command will start a docker container running the Text Generation Inference, on two GPU shards or one shard (in the case of
Falcon-40B-uncensored). It will take some time to run the container, then it will download and convert the Model Weights and finally, will start the server which will be accessible on the<ServerIP>:8080Endpoint. -
Once, it’s done loading, you can test it out by creating a quick Python script on your local device using the
text-generationpackage. Use the following command to install the package.
pip install text-generation
We can create a small Python script as follows:
from text_generation import Client


client = Client("http://<IP>:8080") # Replace the IP with your fluidstack assigned server
print(
    client.generate("Who is 3rd President of USA?", max_new_tokens=15).generated_text
)
This should show you that the result is working.
Running on Lambda Labs #
The process of running the model on Lambda Labs is similar for Falcon-40B and Falcon-40B-Instruct. While, for Falcon-40-Uncensored, we will be using a different command for getting it up and running. You can follow the video tutorial covering deploying Falcon-40B below to get started.
Steps to deploy Falcon-40B Family on Lambda Labs #
The steps of the deploying Falcon-40B family of models are as follows:
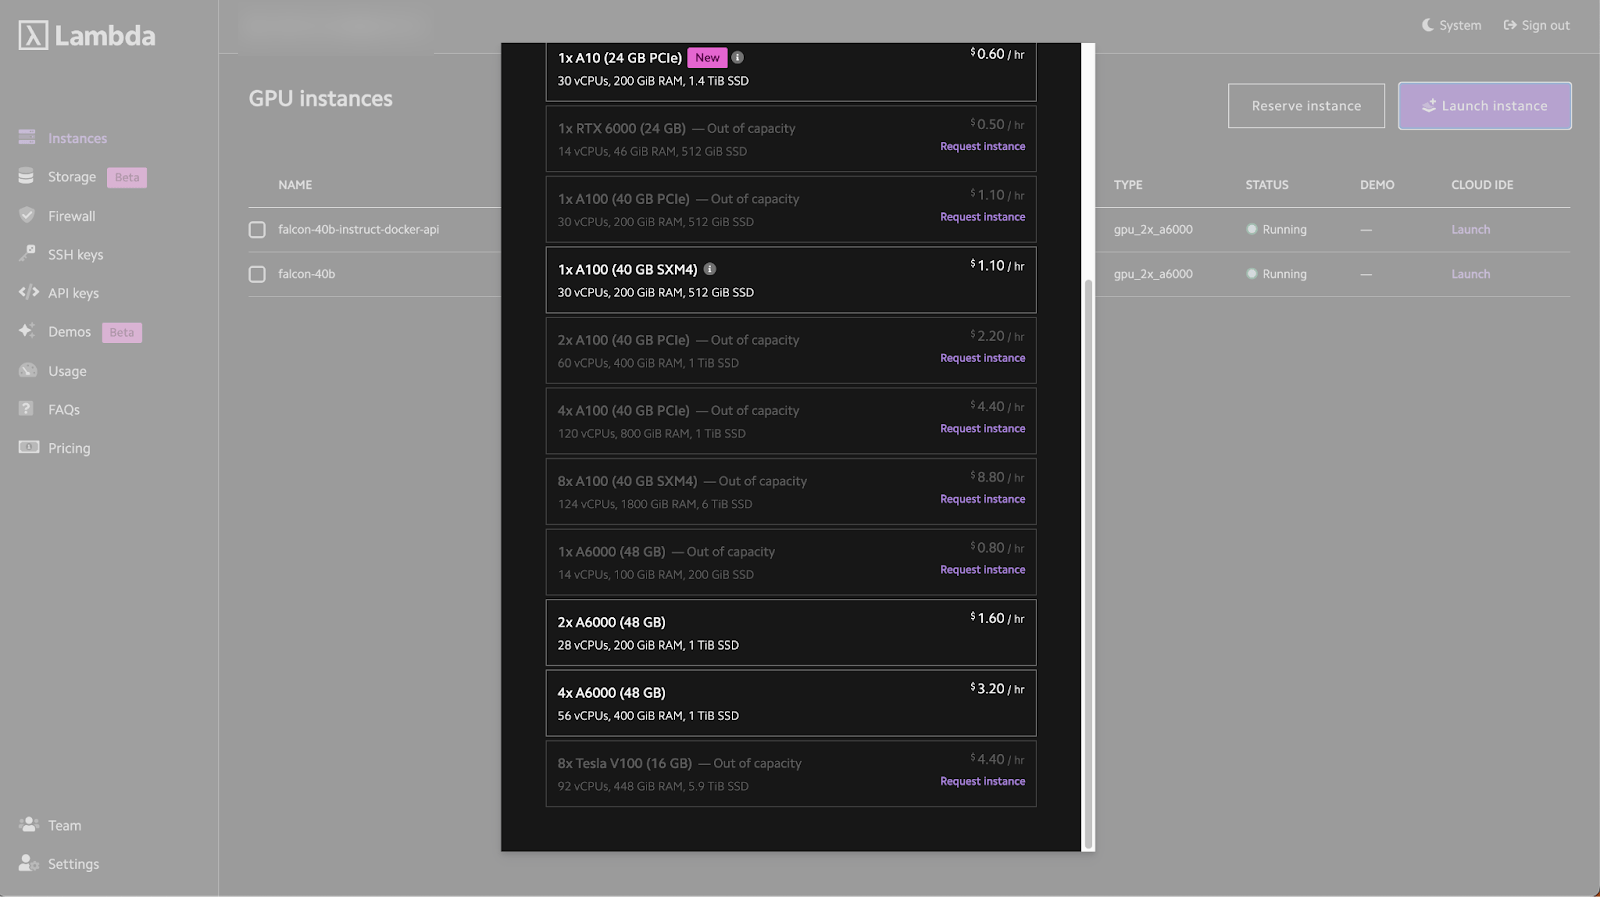
- Sign up for Lambda Labs
- Go to the console and click deploy under ‘2x A6000 48GB’
- To launch the instance, the launch wizard will ask for your SSH key which you can add in the
SSH Keyssidebar.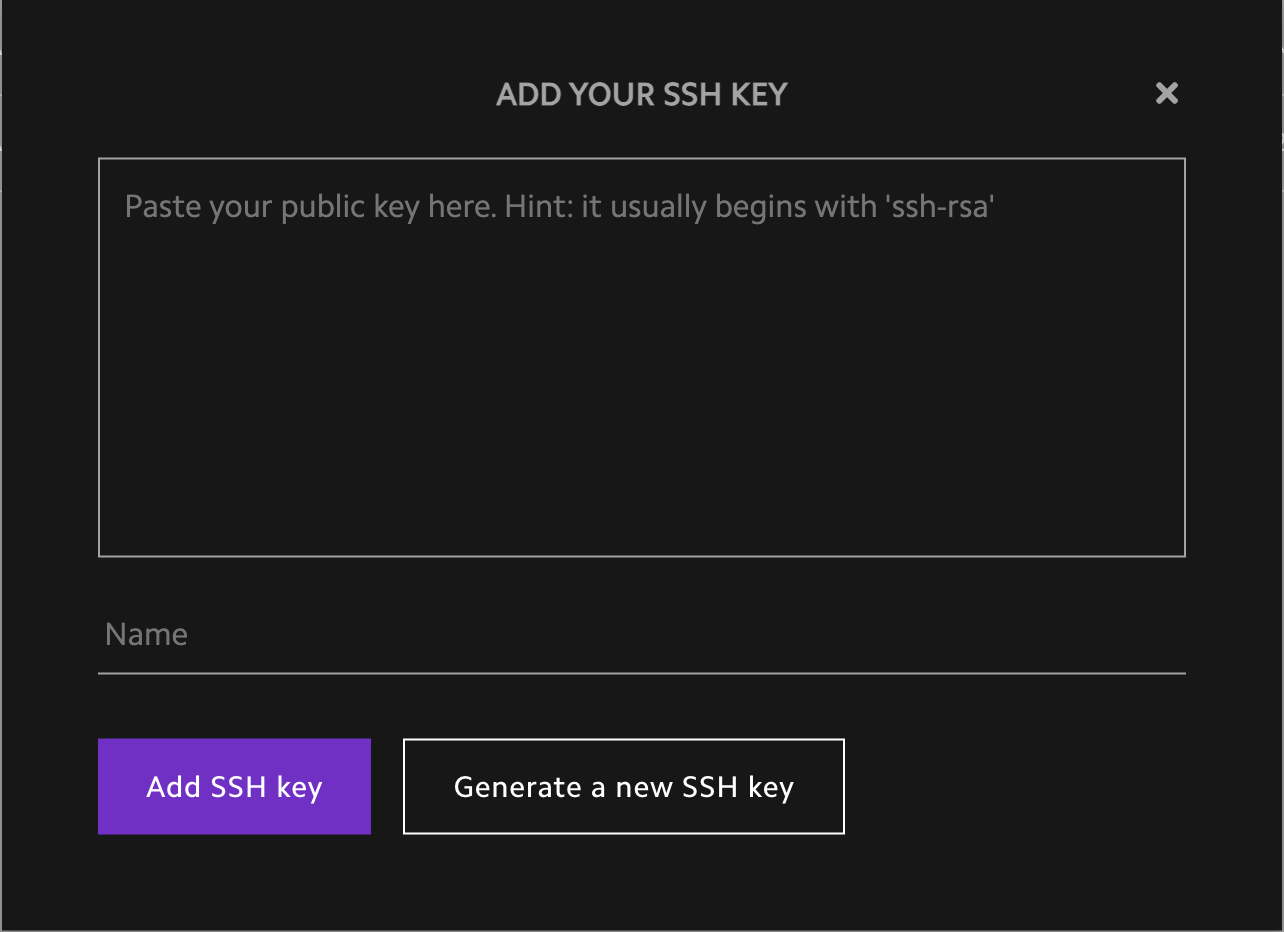
- To access your running server, go to your Lambda Labs Dashboard and click on the SSH login command as shown below:
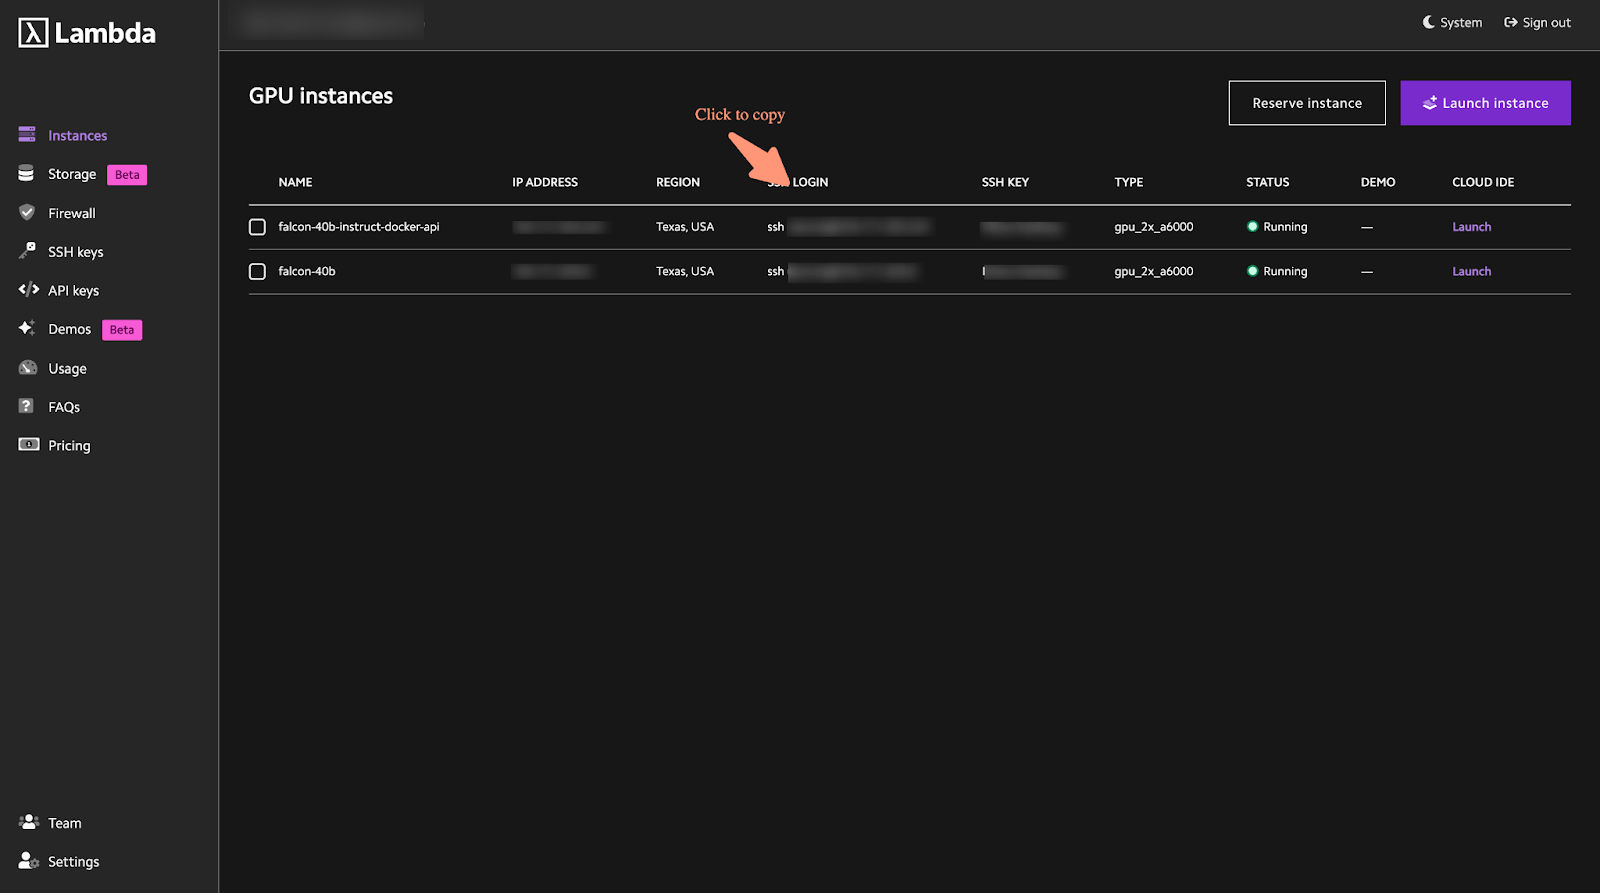
- Enter the ssh command on your terminal.
ssh ubuntu@<IPName>
- While on the server, you can create a new project directory, where we will store the data for the models. For different models, we will be using different directories. For instance, for Falcon-40B, we will be using the
falcon-40bdirectory.
Create a new directory and change the directory to it.
mkdir falcon-40b

cd falcon-40b
-
Now, we can directly start running the models using Text Generation Inference from Hugging Face.
-
To run the Falcon-40B family, we can use the following commands:
- For the Falcon-40B model, we can use the following command.
sudo docker run --gpus all --shm-size 1g -p 8080:80 -v $PWD/data:/data ghcr.io/huggingface/text-generation-inference:latest --model-id tiiuae/falcon-40b --max-input-length 2048 --max-total-tokens 3072 --num-shard=2 --sharded=true
- For the Falcon-40B-Instruct model, we can use the following command.
sudo docker run --gpus all --shm-size 1g -p 8080:80 -v $PWD/data:/data ghcr.io/huggingface/text-generation-inference:latest --model-id tiiuae/falcon-40b-instruct --max-input-length 2048 --max-total-tokens 3072 --num-shard=2 --sharded=true
The difference between the commands for the Falcon-40B and Falcon-40B-Instruct is the --model-id parameter.
- While, for the Falcon-40B-Uncensored model, we can use the following command.
sudo docker run --gpus all --shm-size 1g -p 8080:80 -v $PWD/data:/data ghcr.io/huggingface/text-generation-inference:latest --model-id ehartford/WizardLM-Uncensored-Falcon-40b --max-input-length 2048 --max-total-tokens 3072 --quantize bitsandbytes
Here we are using the --quantize parameter to quantize the model to 8-bit and not using the --num-shard and --sharded parameters as the model is not sharded.
-
This command will start a docker container running the Text Generation Inference, on two GPU shards or one shard (in the case of
Falcon-40B-uncensored). It will take some time to run the container, then it will download and convert the Model Weights and finally, will start the server which will be accessible on<ServerIP>:8080Endpoint. -
Once, it’s done loading, you can test it out by creating a quick Python script by installing the
text-generationpackage from Hugging Face.
pip install text-generation
Now, create a small Python script as follows:
from text_generation import Client


client = Client("http://<IP>:8080") # Replace the IP with your Lambda Labs assigned server
print(
    client.generate("Who is 3rd President of USA?", max_new_tokens=15).generated_text
)
This should show you that the result is working
The End #
Hope that helped!